Windows catch sunlight, frame our views, and—when clean—seem to brighten an entire room. But keeping them spotless doesn’t have to involve harsh chemicals or pricey commercial glass sprays. In recent years, more homeowners have turned to natural cleaning solutions, and vinegar tops nearly every expert’s list for crystal‑clear results.
Learning how to make vinegar window cleaner at home isn’t just a thrifty move—it’s a simple way to cut down on synthetic cleaners, reduce plastic waste, and enjoy a healthier indoor environment. Vinegar’s gentle acidity dissolves grime, fingerprints, and mineral deposits, making it remarkably effective for streak‑free shine.
Beyond its cleaning power, a homemade vinegar solution costs pennies to make and fits perfectly into an eco‑friendly lifestyle. Whether you’re aiming to refresh your living room view or achieve that professional, streak‑free polish, this guide will walk you through proven methods used by both cleaning experts and experienced DIYers to get gleaming, residue‑free windows—without a single harsh chemical in sight.
Understanding the Science: Why Vinegar Works on Glass
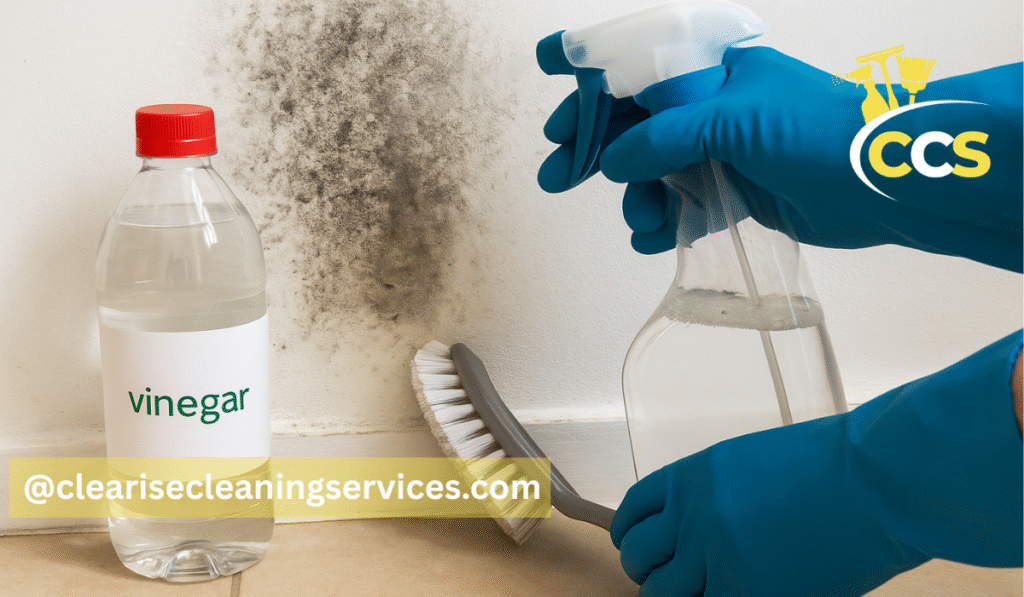
Vinegar might seem like an old‑fashioned cleaning trick, but there’s solid chemistry behind its power. The active ingredient in household vinegar is acetic acid, a mild acid that breaks down many of the substances responsible for dull, cloudy windows. It dissolves mineral deposits left behind by hard water, loosens greasy residues, and cuts through the invisible film that daily life leaves behind on glass.
Most commercial window cleaners rely on a similar principle—acidic or alkaline agents that attack grime at the molecular level. Vinegar’s natural acidity, with a pH around 2.5, is strong enough to dissolve build‑ups yet mild enough to use safely on most glass surfaces. By contrast, many store‑bought glass sprays combine alcohols, detergents, and synthetic fragrances. Those are effective, but they can also be irritating for the skin and lungs or leave behind chemical streaks if not wiped correctly.
Another reason vinegar performs so well is its ability to neutralize alkaline residues, such as soap film or mineral rings from water spots. When vinegar reacts with these alkaline substances, it softens them, making them much easier to wipe away without heavy scrubbing.
That said, a few cautions are worth noting. Vinegar should not be left to sit on window seals made of rubber or silicone, since prolonged contact can slowly degrade these materials over time. Similarly, tinted or specialty‑coated windows may require gentle cleaning solutions recommended by the manufacturer—some coatings can become cloudy if cleaned frequently with acidic liquids.
Used correctly, though, vinegar is one of the safest and most effective natural options available. It’s a small marvel of everyday chemistry—simple, inexpensive, and capable of transforming dull panes into bright, streak‑free glass.
Core Formula: The Best Homemade Vinegar Window Cleaner Recipe
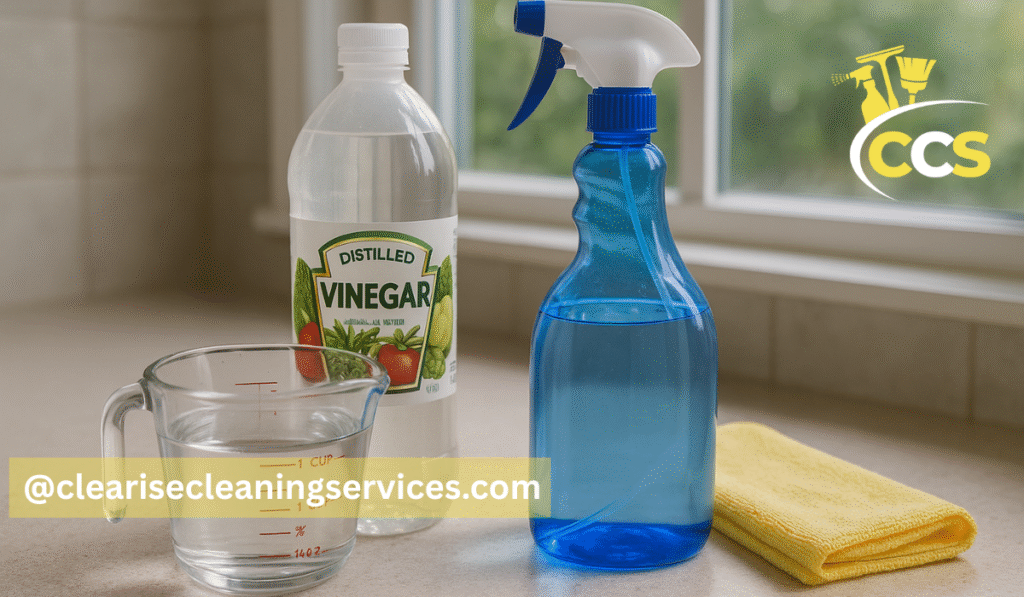
Creating your own window cleaner homemade solution couldn’t be easier—and it all comes down to getting the vinegar window cleaner ratio just right. Cleaning professionals featured on trusted sites like The Spruce and Clean My Space agree that equal parts vinegar and water form the perfect base for everyday glass cleaning.
The Basic Recipe (Tried-and-True Ratio)
- 1 cup white distilled vinegar
- 1 cup filtered or distilled water
- (Optional) 1 small drop of liquid dish soap
That last ingredient, while not essential, can make a noticeable difference. The tiny bit of soap lowers surface tension, helping the solution spread evenly across the glass and cut through oily fingerprints or film that vinegar alone might leave behind.
Step-by-Step Mixing Instructions
- Choose the right container. Use a clean, empty glass spray bottle—vinegar can react mildly with some metals and soften cheap plastic over time.
- Measure and mix. Combine equal parts water and vinegar directly in the bottle.
- Add dish soap if desired. Just a single drop is plenty—too much can cause streaks. Swirl gently to blend (avoid shaking vigorously, which can create unnecessary suds).
- Label the bottle. Write “Vinegar Window Cleaner” and the date on masking tape or a label.
- Store safely. Keep the bottle in a cool, dark cabinet, away from direct sunlight or heat to preserve its cleaning strength.
Safety and Use Tips
- Use room-temperature water; hot water can degrade the vinegar faster and increase streaks on glass.
- Avoid storing this solution near children or food prep areas.
- For especially dirty windows, pre‑wipe dust or loose debris before spraying, so your cloth doesn’t just smear grime around.
This simple mixture delivers high performance with minimal ingredients—an elegant, sustainable twist on traditional cleaning. With this recipe in hand, you’ll have a reliable homemade cleaner that’s affordable, long‑lasting, and safe for nearly every glass surface in your home.
Expert Variations for Every Home
Every home and climate brings its own cleaning challenges—humidity, mineral-heavy water, household pets, or toddlers with sticky fingers. While the basic vinegar-and-water formula works beautifully, these expert-approved variations let you fine-tune your mixture for perfect shine. Each one has been vetted by cleaning professionals and seasoned DIYers who’ve spent years refining their window-cleaning rituals.
Homemade Streak‑Free Window Cleaner (Professional Finish)
If streaks are your biggest annoyance, this homemade streak‑free window cleaner will be your go‑to. Add a tiny squeeze of dish soap or a splash of rubbing alcohol to your base recipe. Both help the mixture dry quickly, which reduces the time moisture sits on the glass—often the main culprit behind visible streaks.
For wiping, microfiber cloths are the clear winners. They’re washable, lint‑free, and excellent at polishing glass without leaving residue. Some old-school cleaners swear by newspaper; while it can work, many modern papers use inks that can smudge or mark, so test first on a corner of the glass.
This recipe also shines (literally) on mirrors, tabletops, or framed photos—any surface that benefits from a reflective finish without streaks or fogging.
Homemade Window Cleaner with Vinegar and Alcohol
In humid climates or cooler weather, standard vinegar cleaner can take a bit longer to dry. Adding rubbing alcohol solves that issue beautifully. It evaporates fast, helping your windows dry crystal clear and streak-free.
Expert ratio:
- ½ cup white distilled vinegar
- ½ cup rubbing alcohol (70% isopropyl)
- 1 cup water
Mix these in a spray bottle, and you’ll have a balanced cleaner that both cuts grease and disinfects lightly—perfect for bathroom mirrors or kitchen windows that collect cooking residue. Because it’s fast-drying, you can also use it safely in colder months when condensation is common.
Homemade Window Cleaner with Ammonia
The homemade window cleaner with ammonia option is a heavier hitter reserved for serious grime. Ammonia effectively dissolves oily residue, making it a good choice for kitchen glass, range‑hood covers, or windows that haven’t been cleaned in a long time.
However, it requires careful handling:
- Always work in a well‑ventilated area to avoid inhaling fumes.
- Wear gloves if you have sensitive skin.
- Never, ever mix ammonia with bleach—the reaction releases toxic chloramine gases.
A safe variation is one tablespoon of clear ammonia per two cups of water, optionally with a few drops of dish soap. Use it sparingly, then rinse the surface with plain water afterward.
Homemade Window Cleaner with Vinegar and Baking Soda (For Stubborn Build‑Up)
For glass streaked with years of build-up, try this homemade window cleaner with vinegar and baking soda. The key is controlling the natural fizzing reaction so it does the scrubbing for you.
Method:
- Sprinkle a teaspoon of baking soda directly onto a damp sponge or cloth.
- Mist the glass with vinegar until you see a gentle fizz—this reaction loosens dirt and mineral crusts.
- Wipe, then rinse with clear water and finish with a dry microfiber cloth.
It’s perfect for window tracks, frames, and neglected glass panes, though the scrubbing step makes it less practical for routine maintenance.
Pros: Tackles grime and residue effectively.
Cons: Requires cleanup after the fizzing step, slightly labor‑intensive.
Homemade Glass Cleaner Without Vinegar (Sensitive Surfaces)
Finally, for anyone with stone window sills, marble countertops, or decorative trim, vinegar’s acidity can cause etching or dulling. In these cases, a homemade glass cleaner without vinegar is the safer choice.
A gentle, effective alternative uses castile soap and citrus essential oils:
- 2 cups warm distilled water
- 1 tablespoon liquid castile soap
- 10 drops lemon or orange essential oil (for fragrance and mild cleaning action).
Shake gently, spray sparingly, and wipe with a microfiber cloth. The mild soap lifts dirt, while the citrus oil adds a fresh scent and slight degreasing power—without risking any surface damage.
Pro Cleaning Technique: The Step‑by‑Step Window‑Washing Routine
Even the best homemade cleaner won’t deliver its full potential without the right technique. Professional window cleaners swear that mastering the method matters just as much as the mixture. Here’s a step‑by‑step routine that ensures a flawless, streak‑free finish every time.
- Prep the Area
Before you even touch the glass, take a dry microfiber cloth or a soft brush and dust the window frames, sills, and corners. This simple step stops dirt and cobwebs from turning into muddy streaks once your spray touches the glass. If the window is especially grimy, wipe it down with a damp cloth first to remove loose debris. - Spray Lightly — Less Is More
A common mistake is over‑spraying. When a window is soaked, the cleaner can run or leave uneven sections that dry at different speeds, causing smears. A fine mist evenly distributedacross the surface is plenty. For large panes, work in sections so the solution doesn’t dry before you wipe. - Wipe Directionally for Clarity
Professional cleaners use a clever trick: wipe horizontally on the outsideand vertically on the inside(or vice versa). That way, if you do spot a streak later, you’ll instantly know which side it’s on. Start at the top of the glass and work down gradually to prevent drips from running over areas you’ve already polished. - Buff to Perfection
After wiping away the cleaner, take a clean, dry microfiber clothor an old cotton T‑shirtfor a final buff. This quick step removes any lingering moisture and gives the glass a noticeably brighter reflection. Microfiber grips microscopic particles far better than paper towels, which can shed fibers and dull the shine. - Troubleshooting Common Issues
- Cloudy residue? Usually this means leftover soap or minerals—simply re‑wipe with distilled water or a vinegar‑only solution.
- Persistent streaks? You might be using too much cleaner or a cloth that’s already damp. Swap in a fresh dry towel.
- Foggy reflections in sunlight? Clean windows later in the day or when the glass is cool; direct heat makes solution evaporate too quickly, leaving marks behind.
Tips from Home‑Care Experts & Real Moms
Professional cleaners and seasoned parents alike tend to agree: the best cleaning hacks are the ones that actually make life easier—not the ones that pile up under your sink. The beauty of a vinegar-based window cleaner is how well it fits into everyday family life: simple ingredients, low cost, and no harsh fumes.
Cleaning consultant Melissa Maker, founder of the channel Clean My Space, often reminds viewers that “vinegar is safe on most glass, but not on tinted film or coated windows.” In plain terms, test first: put a spritz on a small corner before cleaning an entire pane. This five‑second step protects specialty finishes or automotive tinting that could dull over time.
Parents who swear by homemade cleaners share clever practical touches born from experience:
- Sticky fingerprints: If you have young children, keep a small cloth pre‑sprayed with your vinegar mix handy for quick post‑snack clean‑ups on patio doors or mirrors.
- Car interiors: For car windows, use the alcohol‑boosted recipe to speed drying and avoid fogging; just spray onto a cloth rather than directly on glass to prevent overspray on plastic trim.
- Mirror upkeep: A dab of cornstarch in your mix can help banish streaks on high‑humidity bathroom mirrors—a trick many professional cleaners quietly rely on.
The eco‑friendly angle makes this approach even more satisfying. Experts recommend using reusable microfiber cloths, glass spray bottles, and buying bulk distilled vinegar to cut waste. Each batch of homemade cleaner prevents one more plastic bottle from heading to a landfill—a small but meaningful victory for sustainability.
Finally, a safety reminder: even though vinegar is non‑toxic, always label your bottle clearly and store it out of reach of children and pets. Families have enough surprises—toddler taste‑tests shouldn’t be one of them!
Comparing Alternatives: What’s the Best Homemade Window Cleaning Solution?
With so many DIY cleaning options out there, it’s fair to wonder which one truly earns the top spot. The reality is—there isn’t a single “best” recipe for every home. Climate, window material, and the type of dirt you’re battling all influence what works best. Below is a side‑by‑side look at the five most common formulas to help you choose wisely.
Homemade Window Cleaning Solutions at a Glance
| Solution Type | Key Ingredients | Streak‑Free Finish | Eco‑Friendliness | Cost Efficiency | Safety Level | Best For |
| Vinegar & Water | 1:1 vinegar–water mix | ★★★★★ | ★★★★★ | ★★★★★ | Safe on most glass | Everyday use; normal household windows |
| Vinegar & Alcohol | Vinegar + rubbing alcohol + water | ★★★★★ | ★★★★☆ | ★★★★☆ | Flammable—use with care | Humid or cold climates; car windows |
| Ammonia Solution | Water + clear ammonia + dash of dish soap | ★★★★☆ | ★★☆☆☆ | ★★★★☆ | Ventilation required | Greasy buildup, old window film |
| Vinegar & Baking Soda | Vinegar + baking soda reaction | ★★★★☆ | ★★★★★ | ★★★☆☆ | Safe but labor‑intensive | Heavily soiled windows, tracks & frames |
| Castile Soap Blend | Water + castile soap + citrus oil | ★★★☆☆ | ★★★★★ | ★★★☆☆ | Extremely safe, gentle | Delicate finishes, marble or stone areas |
Choosing What Fits Your Home Best
- For most homes: the classic vinegar‑and‑water mix is unbeatable for cost, simplicity, and reliable streak‑free shine.
- For high‑humidity or cold regions: add rubbing alcohol; it speeds drying and prevents fogging.
- For kitchens or older panes: the ammonia blend provides the strength to cut through grease, but use caution—ventilate and keep away from kids or pets.
- For deep cleaning jobs: the fizzing vinegar‑and‑baking‑soda method remains the champion for stubborn buildup on tracks and neglected glass.
- For sensitive or decorative surfaces: switch to a vinegar‑free castile soap cleaner to protect stone, tinted glass, and coated windows.
Think of these formulas as tools in a toolbox. The goal isn’t to find one universal mix, but to know which solution shines brightest for each specific cleaning scenario. No matter your choice, using natural ingredients keeps your glass clear while keeping your home—and the environment—a little bit gentler.
Storing & Shelf Life Tips
Once you’ve mixed up your cleaner, a little attention to storage will keep it fresh and effective for months. Vinegar itself is incredibly stable—it doesn’t spoil or lose potency—but the moment you add water, soap, or alcohol, the shelf life shortens slightly. Here’s how to get the longest use from your homemade batch while keeping it safe and ready to grab for quick clean‑ups.
Shelf Stability of Vinegar‑Based Mixes
- A plain vinegar‑and‑water blend remains effective for roughly 3 to 6 months if stored properly.
- If your cleaner contains dish soap or essential oils, aim to use it within one to two months. These natural additives can eventually break down, producing a cloudy appearance or subtle scent changes.
- Alcohol‑enhanced versions stay stable for a bit longer, since alcohol helps preserve the mixture and discourages microbial growth.
Best Containers for Storage
- Dark glass spray bottles are ideal, especially when your recipe includes essential oils or rubbing alcohol. Light and heat can cause oils to oxidize or evaporate over time.
- If you’re using plastic, choose high‑density, chemical‑resistant bottles—low‑grade plastics can soften from vinegar’s acidity.
- Keep your cleaner in a cool, dry cabinet rather than under direct sunlight or near warm appliances; stable room temperature keeps the ingredients balanced.
Labeling and Date Tracking
A clearly labeled bottle is a sign of a careful cleaner (and helps prevent any “mystery spray” mix‑ups). Write down:
- The name of the cleaner (for example, “Vinegar Glass Cleaner”)
- The main ingredients
- The mix date
If you make different blends—say, one with alcohol and another with baking soda—color‑code the caps or add a small sticker noting which is which. Not only will labeling keep your routine organized, but it also reinforces safe use if others in the household help with chores.
Advanced Touches: Adding Scent & Shine Naturally
Once you’ve mastered the basics, a few thoughtful tweaks can elevate your cleaner from practical to pleasantly personal. These small upgrades—borrowed from both cleaning experts and creative homemakers—enhance fragrance, performance, and even the mood of your cleaning routine.
A Dash of Essential Oils for Freshness and Function
A simple way to improve the scent and cleaning power of your vinegar spray is to add a few drops of essential oils.
- Lemon oil brightens the aroma and cuts through greasy films.
- Lavender adds calm and leaves a welcoming floral note—perfect for bedroom or living‑room windows.
- Peppermint or tea tree oil introduce gentle antimicrobial benefits and a crisp scent that lingers just long enough.
A good ratio is 5–10 drops per cup of solution; shake gently before each use since oils don’t mix permanently with water. Besides giving your cleaner a spa‑like fragrance, these natural oils help mask vinegar’s sharpness—a major upgrade if the smell usually keeps family members grimacing.
Cornstarch: The Unsung Hero of Streak Control
A clever technique making waves on cleaning forums is adding ½ teaspoon of cornstarch per cup of cleaner. It sounds unconventional, but the science is simple: cornstarch acts as a micro‑polisher. It breaks surface tension and prevents visible streaks by catching tiny particles that would otherwise dry unevenly on glass. Shake your bottle well before each use to keep the cornstarch suspended, and prepare to be impressed by the mirror‑like shine it leaves behind.
Seasonal Scents for Festive Cleaning Moods
One joy of homemade cleaners is their flexibility. You can easily switch scents with the seasons:
- Spring: Lemon + lavender for a fresh, airy scent.
- Summer: Grapefruit + peppermint for a cool, crisp finish.
- Autumn: Sweet orange + clove for warmth and spice.
- Winter holidays: Pine or cinnamon essential oil for cozy sparkle.
Your cleaning ritual transforms from a chore into an aromatic refresh for the entire home—windows gleam, rooms smell inviting, and even the act of cleaning feels a touch more satisfying.
Sustainability & Cost Benefits
One of the best parts of switching to a homemade cleaner is realizing just how inexpensive and sustainable it truly is. A single batch of vinegar window cleaner costs only a fraction of what you’d spend on a commercial brand—and that’s before counting the savings from reusable containers and cloths.
Estimated Cost Comparison
- Homemade cleaner: roughly $0.25 per 500 ml (vinegar, water, and a drop of soap).
- Store‑bought spray: between 3and 3and 6 for a similar size, often in single‑use plastic bottles.
That’s up to 95% savings per refill, all for a cleaner that performs just as well—if not better.
The environmental impact is equally satisfying. A few simple choices—buying vinegar in bulk, reusing glass spray bottles, and washing microfiber cloths instead of tossing paper towels—reduce both plastic waste and household carbon footprint. Small steps, repeated regularly, make a measurable difference over a year.
You also get more mileage from your mix than just on windows. Leftovers can safely clean mirrors, glass furniture, shower doors, and stainless‑steel appliances. Instead of juggling multiple specialty sprays, you rely on one versatile solution that fits an eco‑friendly, minimalist lifestyle without compromising on cleanliness or shine.
Conclusion
At the end of the day, what makes homemade vinegar cleaner so enduring isn’t just its thrift or simplicity—it’s how reliably it works. The gentle acidity of vinegar cuts through residue, dust, and mineral film without exposing your home to harsh chemicals. It’s practical science disguised as an everyday household trick.
By understanding the chemistry, fine‑tuning your ingredients, and following proper technique, you gain the same streak‑free finish professional cleaners chase—only at a fraction of the cost and environmental impact. You’re using ingredients you already trust, crafted into something both effective and safe.
Now you know exactly how to make vinegar window cleaner — and why it’s one of the best homemade window cleaning solutions available. With this humble mixture in your spray bottle and a microfiber cloth in hand, every window can gleam like the view deserves: clear, bright, and perfectly natural.
Frequently Asked Questions (FAQs)
Can I Use Apple Cider Vinegar Instead Of White Vinegar?
Yes, you can—but white distilled vinegaris the preferred option. It’s colorless, inexpensive, and leaves less residue. Apple cider vinegar works similarly, but its natural tannins may cause faint streaks or a mild scent that lingers a bit longer.
What’s The Best Vinegar‑to‑water Ratio For Window Cleaning?
The standard vinegar window cleaner ratiois 1 part white vinegar to 1 part water. For heavier grime or hard‑water spots, you can use a stronger blend—about two‑thirds vinegar to one‑third water—but test on a small area first to ensure it’s not too acidic for your glass seals.
Will Vinegar Damage Tinted Or Coated Windows?
Vinegar is safe on most standard glass, yet certain tinted, mirrored, or specialty‑coated windowsneed extra care. Always do a spot testin an inconspicuous corner. For fragile finishes, choose the vinegar‑free castile soap blend described earlier.
Can I Use Vinegar Cleaner On Car Windows?
Yes, though technique matters. Spray the cleaner onto a cloth, not directly on the glass. This prevents overspray onto dashboards or window seals. The alcohol‑based variation is best for vehicles, as it dries faster and leaves fewer streaks.
What Makes My Windows Streaky Even With Vinegar Cleaner?
Streaks usually come from using too much solutionor a damp cloth. Wipe in a single direction (horizontal outside, vertical inside) and buff dry with a clean microfiber towel. Avoid cleaning in direct sunlight to stop premature evaporation.
How Long Does Homemade Vinegar Cleaner Last?
Plain vinegar‑and‑water mixes can last 3 to 6 monthswhen stored in a cool, dark place. If your solution contains dish soap or essential oils, aim to use it within 1–2 monthsfor the best results.
Can Vinegar Disinfect My Windows?
Vinegar kills some household microbes but isn’t a hospital‑grade disinfectant. If sanitation is your goal, use rubbing alcoholin your mixture or clean first with vinegar, then follow with a separate disinfecting wipe only if needed.
Is Vinegar Safe For All Surfaces Near Windows?
Avoid letting vinegar sit on rubber seals, marble, granite, or unfinished wood. Wipe spills immediately, or use the castile soap‑based cleanerinstead for those sensitive materials.
Disclaimer: The information in this article is for general household guidance only. Always test cleaning solutions on a small, hidden area first and follow manufacturer instructions for specialty glass or coatings. Use vinegar‑based cleaners responsibly, keep mixtures clearly labeled, and store them out of reach of children and pets.
Thanks for visiting Clearise Cleaning Services! Discover more helpful tips and expert cleaning insights by exploring our related categories.