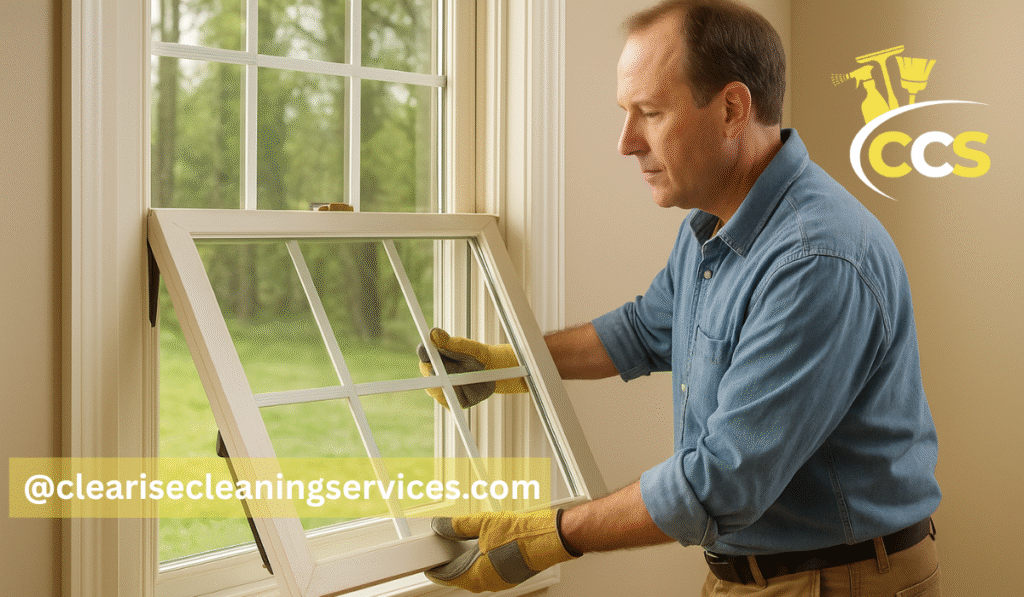
You look out and notice your windows are streaky, but the exterior seems unreachable. It’s frustrating—you wipe the inside glass until it shines, yet those outer smudges and water spots still catch the sunlight. That’s when you realize it’s time to figure out how to open Pella windows for cleaning the right way.
Opening Pella windows correctly is more than just convenience—it’s about safety, care, and protecting your investment. Forcing the frame or twisting the latch the wrong way can damage the sash, loosen the seals, or even void the manufacturer’s warranty. When done properly, though, Pella’s smart design actually makes cleaning both sides of the glass simple and safe, even for upper floors.
In this guide, we’ll walk you through the correct techniques for various Pella window styles, including double-hung, casement, sliding, tilt-in, and blinds-between-glass models. You’ll learn step-by-step how to open each type safely, clean effectively, and keep your windows looking clear and performing smoothly for years to come.
Understanding Your Pella Window Type (Essential Foundation)
Before you start cleaning, it’s important to know what kind of Pella window you have. Each type opens differently, and understanding its mechanism will help you clean it safely without causing any damage. Knowing the exact model also helps you follow the correct instructions, especially when you’re learning how to open Pella windows for cleaning for the first time.
Why the “Type” Matters for Cleaning
Every Pella window design has its own opening method. For example, a double-hung window tilts inward for easy cleaning, while a casement window swings outward using a crank handle. If you try to open a window the wrong way, you could bend the frame, damage the hinge, or misalign the sash. That’s why identifying your window type is the first—and most important—step before cleaning.
Common Pella Window Styles
Pella offers a variety of window designs, each built for a specific function and cleaning method:
- Double-Hung / Tilt-Wash: Both the upper and lower sashes tilt inward, allowing you to clean both sides from inside your home.
- Single-Hung: Only the bottom sash moves or tilts, while the top remains fixed.
- Casement (Crank-Out): Opens outward with a crank handle, giving full access to both the glass and frame edges.
- Awning: Hinged at the top and opens outward from the bottom—ideal for airflow even during rain, but usually cleaned from the outside.
- Sliding (Horizontal): Moves side to side along a track; some models allow you to lift the sash out for easier cleaning.
- Windows with Blinds Between the Glass (Designer Series): These have built-in blinds sealed between panes and special release clips for opening the glass panel safely.
How to Verify Your Window Model
If you’re not sure which type you own, Pella makes it easy to identify your exact model:
- Look for a Serial Sticker: Usually found on the window frame, sash, or between the glass panes. The code helps locate your specific product details on Pella’s support page.
- Check the Owner’s Manual: Visit the official Pella Owner’s Manuals to download guides for your exact window model.
- Why It Helps: Having the manual or serial number ensures you follow the manufacturer’s cleaning and operation instructions—keeping your windows safe, functional, and within warranty.
General Preparations (Before You Try to Open Anything)
Before you start working on your windows, take a few minutes to prepare properly. Many people skip this step, but it’s one of the easiest ways to prevent scratches, cracks, or even accidents while figuring out how to open Pella windows for cleaning. The right setup ensures your windows open smoothly and that the cleaning process goes safely from start to finish.
Safety First: Gloves, Stable Step Stool or Ladder, Eye Protection
Safety should always come first. Wear a pair of soft, non-slip gloves to protect your hands from sharp corners or metal edges. If you’re cleaning upper-floor windows, use a stable step stool or ladder placed on even ground—avoid standing on furniture or window sills. For extra protection, wear clear safety glasses to shield your eyes from dust, debris, or cleaning sprays.
Clean Surroundings: Remove Curtains, Blinds, and Clear the Workspace
Before opening any window, remove curtains, drapes, or removable blinds that might get in the way. Clear furniture or decorations around the area so you have enough space to move freely. A tidy workspace not only keeps things safe but also prevents dust or fabric fibers from sticking to freshly cleaned glass.
Inspect the Frame, Tracks, and Hinges
Take a close look at the window frame, tracks, and hinges before attempting to open it. Over time, dust, paint residue, or debris can build up and make the sash stick. Use a small brush or handheld vacuum to clear away loose dirt. If you notice any rough spots or buildup, gently wipe them with a damp cloth before proceeding—forcing a stuck window can easily damage the mechanism.
Check for Locks or Child-Safety Latches
Most Pella windows come with secure locks or child-safety latches that prevent unwanted opening. Make sure these are fully disengaged before trying to tilt or swing the sash. If you’re not sure where the latches are located, refer to your Pella user manual—each model has a slightly different locking position or release tab design.
Have the Right Tools Ready
Having the proper tools nearby makes the job smoother and safer. Keep the following items within reach:
- A small flat-head screwdriver for gently releasing clips or locks.
- A soft microfiber cloth for wiping away dust and fingerprints.
- A mild window cleaner or a mix of vinegar and water for streak-free cleaning.
- A light cleaning brush or soft paintbrush for corners and tight spaces.
By setting up these essentials before you begin, you’ll save time, reduce the chance of damage, and make the process of opening and cleaning your Pella windows much more efficient.
How to Open (or Tilt) Different Pella Window Styles for Cleaning
Pella designs a wide range of window styles, each with its own opening mechanism. Understanding how each one works helps you clean efficiently without damaging the frame or locking system. Below, you’ll find clear, step-by-step instructions on how to open Pella windows for cleaning, depending on the type you own.
Double-Hung / Tilt-Wash Pella Windows
How the Window Is Designed
Double-hung Pella windows have two sashes—an upper and a lower—both of which can tilt inward. The design uses hidden tilt latches or release buttons located along the top edge of each sash, allowing easy access to both sides of the glass from inside your home.
Step-by-Step Method to Open or Tilt It Safely
- Unlock the window by sliding the locks inward toward the center.
- Raise the bottom sash a few inches to create space.
- Locate the tilt latches on the top corners of the sash.
- Slide both latches inward toward the center while gently pulling the top of the sash toward you.
- Rest the tilted sash on the window sill for support.
- Repeat the same process with the top sash, pulling it down slightly before tilting it inward.
Now you can easily clean both the interior and exterior surfaces without going outside.
Troubleshooting / Common Mistakes
- Stiff pivots or tilt arms: Apply a drop of silicone lubricant to the hinges.
- Sash not staying tilted: Check if both latches are fully engaged.
- Misalignment: Ensure both pivot shoes are seated properly before pushing the sash back in.
Special Notes
According to Pella’s own cleaning guide, always tilt sashes gently inward—never twist or force them—to avoid bending the pivot mechanism or scratching the frame.
Single-Hung with Tilt Capability
How the Window Is Designed
Single-hung windows have only the bottom sash that moves or tilts inward, while the upper sash remains fixed. Some newer Pella models come with a tilt option for easier cleaning.
Step-by-Step Method to Open or Tilt It Safely
- Unlock the window.
- Lift the bottom sash upward a few inches.
- Press the tilt-release buttons on both top corners of the sash.
- Carefully pull the sash toward you until it tilts inward at about a 45-degree angle.
- Rest it gently on the sill while cleaning.
Troubleshooting / Common Mistakes
- If the sash doesn’t tilt, check your model—some single-hung windows are stationary at the top.
- Avoid pulling the sash without pressing both release tabs; this can crack the track.
Special Notes
Because only the bottom sash moves, you may still need to clean the top exterior from outside or with an extendable cleaning pole.
Casement (Crank-Out) Windows
How the Window Is Designed
Casement windows are hinged on one side and open outward using a crank handle. They provide excellent ventilation and can often open wide enough to let you clean both sides from indoors.
Step-by-Step Method to Open or Tilt It Safely
- Unlock the window using the side latch.
- Turn the crank handle counterclockwise to open the sash outward.
- Keep cranking until the sash opens fully—some Pella casements open nearly 90 degrees.
- Hold the open sash with one hand or use the built-in hold-open arm for stability.
- Clean both sides of the glass carefully.
Troubleshooting / Common Mistakes
- Overextending the arm: Stop cranking when you feel resistance to avoid bending the hinge.
- Stiff crank: Apply a small amount of lubricant to the gear mechanism.
Special Notes
Casement designs make it easy to clean from inside, but always ensure the sash is fully supported when open, especially on windy days.
Awning / Hopper Windows
How the Window Is Designed
Awning windows are hinged at the top and open outward from the bottom. Hopper windows, on the other hand, are hinged at the bottom and open inward from the top.
Step-by-Step Method to Open or Tilt It Safely
- Unlock the window.
- Use the crank handle or lever lock to open the window outward (awning) or inward (hopper).
- Secure it in place using the friction hinge or support arm.
- Clean the interior side first, then carefully reach or use a long-handled brush to clean the outer side.
Troubleshooting / Common Mistakes
- Avoid pushing the window beyond its hinge limit.
- If the window doesn’t open smoothly, check for dirt buildup in the side tracks.
Special Notes
Because awning windows open outward, you may need a ladder or telescopic cleaning tool for the outer surface, especially on higher floors.
Sliding (Horizontal) Windows
How the Window Is Designed
Sliding windows move side to side on horizontal tracks. Most modern Pella sliders have lift-out or tilt-in sashes, making cleaning easier than older fixed designs.
Step-by-Step Method to Open or Tilt It Safely
- Unlock the window.
- Slide the movable sash toward the center.
- Lift the sash upward into the top track and pull the bottom edge gently toward you.
- Once the sash clears the frame, tilt or remove it completely for cleaning.
- Repeat with the second sash if removable.
Troubleshooting / Common Mistakes
- If the sash won’t lift, check for track obstructions or paint buildup.
- Never force the sash—clean and lubricate the tracks first.
Special Notes
Sliding windows can feel snug due to weather seals; a light lift before tilting makes removal smoother.
Windows with Blinds Between Glass / Integrated Treatments
How the Window Is Designed
These Pella windows have built-in blinds or shades sealed between two panes of glass, keeping dust out. Some models include removable interior glass panels held by spring-loaded clips or sliding locks.
Step-by-Step Method to Open or Tilt It Safely
- Locate the spring clips or slide locks along the window frame.
- Slide each clip gently toward the edge to release the glass panel.
- Once released, swing the panel outward at a 45–50° angle.
- Clean both sides carefully, avoiding direct pressure on the glass.
Troubleshooting / Common Mistakes
- If clips feel stuck, use a small flat screwdriver wrapped in a cloth to nudge them gently.
- Never force open a sealed glass panel—some blinds systems are non-removable.
Special Notes
According to professional window cleaners, always support the pane with one hand while releasing clips. For Designer Series models, refer to your Pella manual to confirm if your blinds panel can be opened safely.
Step-by-Step Cleaning Workflow (After Opening)
Once you’ve safely opened your Pella windows, it’s time to clean them properly. Doing this the right way helps maintain clarity, prevents streaks, and extends the life of your windows. Follow these practical steps to make cleaning easier and more effective.
Order Matters: Exterior First or Interior First?
Always start with the exterior side of the glass. The outside surface collects more dirt, dust, and water stains, so cleaning it first prevents spreading grime to the cleaner inside panes. Once the exterior is spotless, move to the interior side using a fresh cloth to avoid streaking.
Cleaning Solution Recommendations
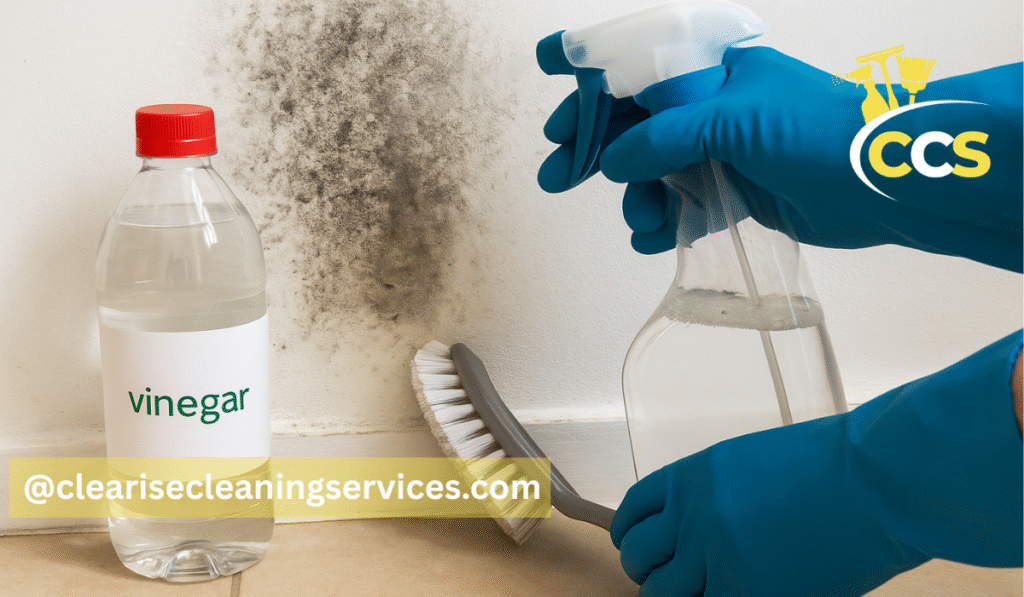
Pella recommends using non-ammonia, vinegar-based, or mild dish soap solutions for the best results. Ammonia-based cleaners can harm window finishes or seals. You can make a simple DIY cleaner by mixing:
- 1 part white vinegar
- 3 parts warm water
- A few drops of mild dish soap (optional)
For a streak-free finish, spray lightly and wipe quickly before the solution dries. Avoid oversaturating the edges to protect the window seals.
Tools to Use
Use gentle tools that won’t scratch the glass or frame:
- Microfiber cloths: Great for streak-free glass cleaning.
- Soft brushes: Ideal for removing dust from corners and hinges.
- Sponge or soft pad: Works well for general washing.
- Squeegee: Perfect for larger windows—use from top to bottom for a clear finish.
Avoid rough paper towels or scouring pads, as these can leave scratches.
Frame, Track, and Hinge Cleaning
While cleaning the glass, don’t forget the frame, tracks, and hinges. Dust, dirt, and moisture buildup in these areas can affect smooth operation.
- Use a small soft brush or a handheld vacuum to remove loose debris.
- Wipe tracks with a damp microfiber cloth.
- Dry thoroughly before closing the window to prevent corrosion or mildew.
You can also apply a silicone-based lubricant to the hinges or tracks for smoother movement.
Rinsing and Drying Technique
After wiping with your cleaning solution, rinse lightly with clean water (if needed) and use a dry microfiber cloth or squeegee to remove excess moisture.
- Dry in circular motions or vertical strokes to avoid streak marks.
- For tall windows, use an extendable handle to maintain consistent pressure and reach.
Reclosing Method: Align, Click In, Test Functionality
Once your windows are clean and dry:
- Gently tilt or swing each sash back toward the frame.
- Align both sides evenly with the track or hinges.
- Push until you hear a click, indicating it’s locked in place.
- Re-lock the window and test it by opening and closing once more to ensure smooth operation.
Let Panes Sit Slightly Open if Needed
If there’s still moisture inside the tracks or corners, leave the window slightly open for 10–15 minutes to let the air circulate and dry everything completely. This prevents moisture buildup that could affect the seal or hardware.
Expert Tips & Lesser-Known Tricks
Once you’ve mastered the basics of how to open Pella windows for cleaning, a few professional techniques can make your maintenance routine faster, safer, and more effective. These expert-backed tips help extend the lifespan of your windows and keep them operating smoothly year-round.
Use a Gentle Silicone Lubricant on Pivots Once a Year
A small touch of silicone-based lubricant on the window pivots, tracks, and hinges once a year helps keep them gliding smoothly. Avoid oil-based products like WD-40—they attract dust and can damage rubber seals over time.
Warm Up Window Frame Edges in Cold Weather
If you’re cleaning windows during winter, let some sunlight or gentle warmth from a hairdryer (on low heat) soften the edges of the frame before opening. This reduces stiffness and prevents cracking or breaking delicate components in freezing temperatures.
Use a Vacuum with Soft Brush on Tracks Before Wet Cleaning
Before applying any cleaner, use a vacuum with a soft brush attachment to remove loose dirt and debris from the tracks. This prevents grit from turning into mud when wet and helps windows close more securely after cleaning.
Try Microfiber Mitts for Tight Corners
Microfiber cleaning mitts fit over your hand and are perfect for cleaning narrow spaces, corners, and edges that are hard to reach with a regular cloth. They also minimize streaks and are gentle on the glass surface.
Clean from Inside Using Extension Poles or Water-Fed Brushes
If you live in a multi-story home, use extension poles or water-fed brushes designed for indoor use. These tools allow you to clean exterior glass from inside without climbing ladders or leaning dangerously out of windows.
Hold Panes Securely While Working
Always support the glass panel with one hand while wiping, especially when it’s tilted inward. Avoid applying too much pressure on one side—it can unseat the pane or strain the hinges.
In Extreme Cases: Partially Remove the Sash
If the sash is too dirty, or you need deep cleaning, some Pella models allow partial sash removal. Refer to your owner’s manual to see if your window supports this feature. Always follow the official removal instructions to avoid breaking any clips or seals.
Keep Records for Warranty Reference
After every major cleaning, note the window serial number and date of service. This small step helps track maintenance and can be useful if you ever need warranty support from Pella. It also shows you’ve taken proper care of your windows—a plus if you sell your home later.
Common Problems & Troubleshooting (with Solutions)
Even when you follow every instruction carefully, minor issues can still come up while learning how to open Pella windows for cleaning. Most of these problems are easy to fix with a few simple steps. Below are some common issues homeowners face — along with clear, practical solutions.
Window Won’t Release / Stuck Clips
If your Pella window won’t tilt or release, it’s often due to dust, dried paint, or misaligned clips.
Solution:
- Check that the window is unlocked before trying to tilt it.
- Gently slide a flat-head screwdriver wrapped in a cloth between the clip and frame to loosen it.
- Spray a bit of silicone lubricant on the moving parts if they feel stiff.
- Avoid forcing the sash — too much pressure can crack the pivot shoes or warp the frame.
Pane Tilts but Won’t Swing Fully
Sometimes, the window tilts halfway but refuses to swing out for full cleaning access.
Solution:
- Ensure both tilt latches are pulled in simultaneously before tilting.
- If the sash tilts unevenly, gently lift it back to the upright position and re-try.
- Lubricate the pivot arms or hinges to help the sash move smoothly.
- If you hear grinding, stop immediately and inspect for trapped debris or paint buildup.
Rattling or Misalignment After Closing
After cleaning, you may notice a slight rattle or gap when you close the window. This usually happens if the sash wasn’t re-seated correctly in its track.
Solution:
- Open the window again and check that both pivot shoes are aligned evenly.
- Push the sash gently until you hear a click as it locks back into place.
- Close the window and test for smooth movement.
- For persistent rattling, inspect the weatherstripping — worn or loose strips may need replacement.
Condensation or Moisture Trapped After Reinstallation
Seeing fog or moisture between panes after closing the window can be alarming but is often temporary.
Solution:
- Open the window slightly and let it air dry for 15–30 minutes.
- Wipe any visible moisture from tracks and corners.
- If condensation stays for days, check the seal integrity — it might indicate a failing insulated glass unit (contact Pella support if under warranty).
Scratches or Scuff Marks During Manipulation
Minor scratches can appear when tools or jewelry come into contact with the glass or frame.
Solution:
- Use a non-abrasive cleaner and a microfiber cloth to buff out small marks.
- For deeper scratches, apply a glass polishing compound like cerium oxide.
- To prevent future scuffs, always remove rings or watches when handling the sash.
Damage to Blinds-Between-Glass by Improper Handling
If your window has built-in blinds between the glass, rough handling can cause misalignment or jamming.
Solution:
- Never force the glass panel open — check for spring clips or side locks and release them gently.
- Keep your hands steady and avoid pressing on the glass surface.
- If the blinds appear stuck or crooked, contact a Pella service technician instead of trying to fix them yourself.
By understanding these common issues and their solutions, you’ll be able to maintain your windows safely and extend their lifespan — all while keeping them spotless and easy to operate.
When to Call a Professional
Even with the best care and preparation, there are times when it’s safer and smarter to let a professional handle your Pella windows. Knowing when to stop and seek expert help protects your investment, keeps your warranty intact, and prevents costly damage. Here’s when you should consider calling a window specialist.
When Mechanisms Are Stiff or Failing
If your window’s crank handle, tilt latches, or sliding tracks feel unusually stiff, forcing them can break internal parts. A technician can safely lubricate, realign, or replace these components without harming the sash or frame.
If Seals or Glass Integrity Might Be Compromised
Noticing fog, cracks, or moisture between panes? That’s often a sign of a failed seal or compromised glass unit. In such cases, professional attention is needed to restore insulation and clarity—DIY repairs could void your warranty.
For Very Large or Unusually Designed Windows
Some Pella designs, especially bay, bow, or custom-shaped models, require specific tools and expertise to open safely. Professionals have the right equipment to handle large or heavy panes without risk of breakage.
For Warranty Preservation in Newer Models
If your windows are still under Pella’s manufacturer warranty, having them serviced by authorized professionals ensures you don’t accidentally void coverage. Pella-approved technicians know the correct adjustment methods and document their work for warranty records.
What to Ask a Professional
When scheduling a service call, be specific. Mention:
- Your window type and model number (found on the serial sticker or manual).
- That you’re experiencing issues with the tilt mechanism or clip release.
- Any visible damage or difficulty opening and closing the sash.
This helps the technician prepare with the correct parts and tools, saving you time and cost.
Conclusion
Learning how to open Pella windows for cleaning doesn’t have to be complicated. The key is to understand your window type, follow the correct steps, and handle the parts gently. Each design—from double-hung to casement or blinds-between-glass—has its own safe way to open and clean efficiently.
Once you’ve mastered one window, the rest become easy. Regular, gentle cleaning keeps your glass spotless, hinges smooth, and your home filled with bright, natural light.
Before you begin, check your window’s model number and download the Pella owner’s manual for detailed guidance. Start with one window, take your time, and soon you’ll have every pane in your home sparkling like new.
Frequently Asked Questions (FAQ)
Can I Open Pella Windows From Inside Only?
Yes, most Pella windows are designed to open and clean from inside your home. Tilt-wash, casement, and certain sliding models make it easy to reach exterior glass without going outdoors. Always refer to your window’s manual to confirm its opening method.
Do All Pella Windows Tilt For Cleaning?
Not all models tilt inward. Double-hung and some single-hung windows do, but casement, awning, and sliding styles open differently. Check your model type before attempting to tilt the sash to prevent bending or damage.
Is There A Youtube Or Video Showing How To Open Pella Windows For Cleaning?
Yes — Pella offers step-by-step video demonstrations on its official YouTube channel, including the “Ask Pella” series. These short tutorials visually show how to tilt or crank open various window types safely.
How Do I Open Pella Windows With Blinds Between Glass For Deep Cleaning?
For windows with built-in blinds between glass, locate the spring-loaded clips or release locks around the frame. Gently slide or press them to unlock the panel, then tilt the interior glass outward about 45 degrees for cleaning. Be cautious—some models are sealed and not meant to be opened.
Will Opening Windows Void My Warranty?
No, opening your windows for cleaning as instructed won’t void the warranty. However, damage from forced movement, tool misuse, or disassembling sealed units could. Always follow Pella’s manual or contact customer support if unsure.
Will Tilting Stress the Frame Over Time?
If done correctly, tilting won’t harm your window. Pella’s tilt mechanisms are built for regular use, but avoid jerky movements or forcing stiff sashes. A quick yearly check and light lubrication will keep everything operating smoothly.
Disclaimer: The information in this article about how to open Pella windows for cleaning is provided for general educational and maintenance purposes only. Always follow the official cleaning and operating instructions included with your Pella windows or available on Pella’s official website. Improper handling, use of tools, or forcing window parts may cause damage, injury, or void the manufacturer’s warranty. The author and publisher are not responsible for any loss, damage, or injury resulting from the use or misuse of the information provided. If you are unsure about your window model, experience mechanical resistance, or notice damage to seals, locks, or hinges, it is strongly recommended to contact a certified Pella technician or professional window service before attempting repairs or cleaning.
Thanks for visiting Clearise Cleaning Services! Discover more helpful tips and expert cleaning insights by exploring our related categories.