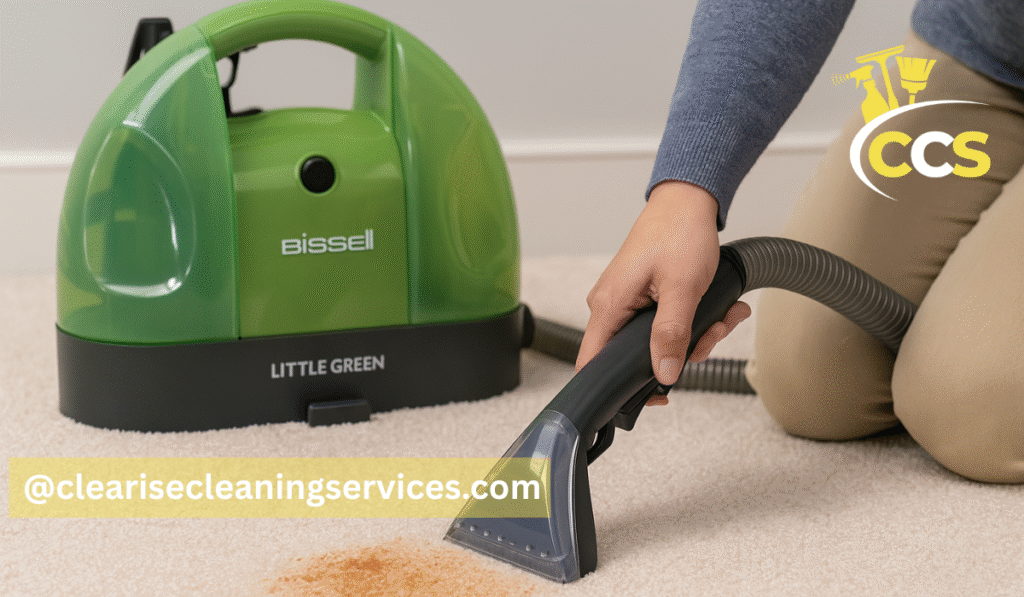
If you’ve ever dealt with juice stains, muddy paw prints, or a baby’s accidental spill on the carpet, you know how stressful it can be to keep your home clean. That’s where the Bissell Little Green comes in. This compact, portable carpet and upholstery cleaner is designed for everyday messes—perfect for parents, pet owners, and anyone who wants quick, reliable cleaning without dragging out a full-size machine.
This guide is here to answer one of the most common questions people ask: how do you use a Bissell Little Green carpet cleaner? We’ll break it down step by step, from setting up and filling the tanks to cleaning, maintenance, and troubleshooting. On top of that, we’ll share practical tips from real users and cover advanced features across different models like the Max Pet, Pro, and HydroSteam.
Whether you’re a new parent facing baby food spills, a pet owner tackling accidents, or simply someone tired of stubborn stains, this article is designed to walk you through everything in a friendly, easy-to-follow way.
Getting to Know Your Bissell Little Green
Before jumping into cleaning, it’s important to understand the machine itself. Knowing the main parts, models, and safety guidelines will help you use it correctly and avoid common mistakes.
1. Key Parts & Components
The Bissell Little Green is designed to be compact, but it still has a few essential parts you’ll work with each time:
- Clean water/solution tank – holds the mixture of water and cleaning formula.
- Dirty water tank – collects the liquid and dirt pulled from carpets and upholstery.
- Spray trigger – located on the handle, it controls when cleaning solution sprays out.
- Suction head/nozzle – the main cleaning tool that sprays, scrubs, and sucks up liquid.
- Brush attachment – helps loosen stains and scrub stubborn spots.
- Hose – connects the tank system to the cleaning head, giving you reach for stairs, car seats, or furniture.
- Clamps/latches – keep the tanks secured in place.
Learning these parts makes the step-by-step cleaning process much easier.
2. Common Variants & Model Names
Over the years, Bissell has released several Little Green versions, each with small differences:
- Little Green 1400 – the classic entry-level model, basic but effective.
- Little Green Max Pet (3857) – includes extra pet tools and a SmartMix feature to adjust cleaning solution strength.
- Little Green Pro / ProHeat – larger capacity and heating function for tougher jobs.
- Little Green HydroSteam – adds a steam mode for deeper stain removal.
- Little Green Cordless – battery powered for quick clean-ups without plugging in.
When you know which model you have, you’ll understand small differences in setup. For example, the HydroSteam requires a few extra seconds for steam to build before use, while the Cordless needs to be charged before cleaning.
3. Safety & Labeling Reminders
Using the Little Green is straightforward, but a few safety notes are worth remembering:
- Check voltage – make sure your outlet matches the machine’s requirements.
- Read upholstery tags – many sofas, chairs, or rugs have cleaning codes like W, WS, or S.
- W/WS means water-based cleaning is safe.
- S usually means solvent-based cleaning only—avoid using the Little Green.
- Avoid overheating – only use warm water (not boiling) to protect the internal parts.
By keeping these points in mind, you’ll get the best results while keeping both your home and your machine safe.
Preparing the Machine
Before you start cleaning, it’s important to set up your Bissell Little Green properly. A few minutes of preparation will make the whole process smoother and help you avoid problems during use.
1. Unboxing and Accessory Check
When you first open the box, check that all parts are included. Most Little Green models come with:
- The machine body
- Clean water/solution tank
- Dirty water tank
- Hose with spray trigger
- Standard suction tool or brush head
- Any extra attachments (like a pet stain tool or stair tool, depending on the model)
If you notice something missing, contact Bissell support before trying to use the cleaner.
2. Assembly – How to Snap Parts Together
Assembly is usually quick since most parts come pre-installed. Typically, you only need to:
- Attach the hose securely to the base.
- Place the clean and dirty tanks into their slots until they click into place.
- Make sure the power cord and hose are untangled before use.
3. Choosing Water and Cleaning Formula
- Water temperature limit – Use warm tap water up to about 140 °F (60 °C). Avoid boiling water, which can damage the tanks or seals.
- Why use genuine Bissell formula – Bissell recommends their own carpet and upholstery solutions because they are designed for the pump system, prevent clogs, and keep the warranty valid. Off-brand cleaners may foam too much or leave residue.
- Formula proportions – Follow the lines on the clean tank. For smaller jobs, use the “small area” line; for larger jobs, fill up to the “large area” mark. Some models, like the Max Pet, let you adjust solution strength with a SmartMix feature.
4. Filling the Clean Water / Solution Tank
- Remove the clean tank from the machine.
- Unscrew the cap and fill with the right amount of warm water first.
- Add the cleaning formula up to the fill line.
- Screw the cap back on tightly to avoid leaks.
Mistakes to avoid:
- Don’t overfill the tank—it can cause the solution to leak or reduce spray pressure.
- Don’t use water hotter than 140 °F. Overheating may warp plastic parts.
- Don’t add vinegar or bleach unless the manual specifically allows it, since it can damage seals.
5. Inserting the Clean Tank and Prepping the Dirty Tank
- Slide the filled clean water tank back into its slot until it locks.
- Check that the dirty water tank is empty and seated properly. If it’s not, suction will be weak.
- Make sure all latches are closed so the tanks don’t shift during cleaning.
Once the tanks are ready, your Little Green is set for action.
How to Use the Machine (Step-by-Step)
Once your Bissell Little Green is filled and ready, it’s time to start cleaning. Here’s a simple walkthrough that works across most models, with notes on special features where needed.
1. Pre-Clean Prep
- Vacuum or remove solids first – Pick up crumbs, pet hair, or any solid mess with a vacuum or paper towel. This keeps the tanks from clogging.
- Pre-treat stains – For stubborn spots (like wine, coffee, or pet accidents), spray a bit of Bissell stain remover and let it sit for 5–10 minutes. This softens the stain so the Little Green can lift it more easily.
2. Connecting Hose and Tool
Choose the right cleaning attachment (standard suction head, pet tool, or stair tool) and snap it onto the end of the hose. Make sure you hear a click so it’s locked in place.
3. Powering On & Priming
- Plug in the machine and switch it on.
- Prime the hose by holding down the spray trigger for about 30 seconds until a steady spray appears.
- If you’re using a HydroSteam model, wait for the steam light to indicate it’s warmed up. This usually takes a minute or two.
4. Cleaning Motion Technique
The secret to good results is using the right motion:
- Spray → Scrub → Suction – Pull the trigger to spray solution, scrub gently with the brush, then release the trigger and slowly pull back to suction up the dirty water.
- Angle & speed – Keep the tool flat against the fabric, and move slowly. Quick passes won’t give the suction enough time to pull liquid out.
- Pressure – Light to medium pressure works best. Pressing too hard can block suction.
- How many passes? – Usually 2–3 spray-and-suction passes are enough. Follow with a couple of drying passes (no spray) to remove extra moisture.
5. Drying Strokes & Final Pick-Up
Always finish with at least one or two dry passes. This step is key—it helps carpets and upholstery dry faster and prevents a damp smell later.
6. Handling Larger Areas or Persistent Stains
- For bigger spills, work in sections instead of trying to clean the whole area at once.
- For old or stubborn stains, repeat the spray-scrub-suction cycle a few times. If the stain lingers, let the area dry fully, then try again the next day.
7. Using Specialty Modes or Attachments
Different models have extra features that make cleaning easier:
- Max Pet / SmartMix – Lets you choose stronger or lighter cleaning solution settings for pet stains vs everyday spots.
- Pro / ProHeat – Maintains water temperature for better stain removal, useful for bigger jobs.
- HydroSteam mode – Uses steam plus cleaning solution for deep stains (ideal for old spills or tough odors).
- Cordless model – Works the same way but relies on battery power, so keep an eye on run time and recharge when needed.
With these steps, you’ll get efficient, professional-looking results without overcomplicating the process.
Disassembly, Cleaning & Maintenance
Taking care of your Bissell Little Green after each use is just as important as the cleaning itself. A few simple maintenance steps keep it running smoothly, prevent odors, and extend the life of the machine.
1. Draining and Cleaning the Dirty Water Tank
- Once you’re finished cleaning, turn off and unplug the machine.
- Remove the dirty water tank and carefully pour the contents down a sink or toilet.
- Rinse the tank with warm water until no debris or residue remains.
- Wipe the outside dry before snapping it back into place.
2. Rinsing Hoses, Tools, and Nozzles
Dirty water and cleaning formula can build up in the hose and attachments if left inside.
- Fill the clean tank with plain warm water.
- Hold the spray trigger and run the machine for about 15–20 seconds to flush clean water through the hose and nozzle.
- Detach the cleaning tool and rinse it under running water.
3. Cleaning or Unclogging the Spray Nozzle & Brush Head
Over time, the spray tip or brush head can collect lint, hair, or dried formula.
- If your model allows, gently detach the brush head from the tool.
- Use a toothpick or soft brush to remove debris from the spray opening.
- Rinse the parts thoroughly and let them air dry.
4. Drying All Parts Before Storage
Moisture trapped inside the machine can cause mildew or odors. After rinsing:
- Leave the tanks open to air dry.
- Hang the hose loosely instead of wrapping it tightly, so water drips out.
- Allow the nozzle and brush to dry completely before reattaching.
5. Preventive Care & Schedule
A little routine care goes a long way:
- After each use – Empty tanks, rinse hose and tools, wipe the exterior.
- Weekly (if used often) – Deep rinse the hose with clean water, check spray nozzles.
- Monthly – Inspect the brush head for buildup, check for hose blockages, and clean any filters (model-specific).
By building these habits, you’ll keep your Little Green fresh, odor-free, and ready for the next mess.
Advanced Tips, Tricks & Expert Advice
Once you know the basics, you can get even more out of your Bissell Little Green by learning a few insider tricks and advanced tips. These suggestions come from experienced users, expert cleaners, and common troubleshooting practices.
1. Tips from Experienced Users
- Many owners say they use less formula than recommended—sometimes just a teaspoon per tank—because it still cleans well and saves money.
- For faster drying, always do extra “dry-only” passes without spraying.
- Keep a small spray bottle of pre-mixed solution handy so you can quickly pretreat stains before they set.
2. Problem Signals & What They Mean
Your Little Green may give you clues when something isn’t right:
- Loss of suction – The dirty water tank might be full or not seated properly. Check for hose blockages.
- Odd sounds – Gurgling often means the clean tank is empty; grinding can mean a clogged nozzle.
- No spray – Usually caused by air trapped in the hose; re-prime by holding the trigger for 30 seconds with the tank full.
3. Uncommon but Useful Hacks
- Stairs – The hose is long enough for most staircases; use the small brush tool for edges.
- Upholstery & car interiors – Perfect for car seats, strollers, couches, and even mattresses.
- Pet accidents vs food/drink spills – For pet messes, always sanitize thoroughly and do multiple passes to prevent odor. Food or drink stains usually respond to one or two treatments.
- Multi-surface cleaning – Some users connect adapter tools to use the Little Green on tile grout or hard-to-reach corners. Always test first to avoid damage.
4. How to Disassemble the Brush Head / Nozzles for Deep Cleaning
If the brush head is clogged with hair or residue:
- Detach it from the hose.
- On some models, you can remove the clear plastic cover with a small screwdriver or clip release.
- Rinse under warm water and scrub gently with a toothbrush.
- Let it dry fully before reattaching.
5. Video & Visual Help
Sometimes it’s easier to see the process in action. Bissell provides instructional videos on their official site and YouTube channel. For example, the Bissell Little Green Max Pet SmartMix video shows how to set the cleaning strength and tackle tough pet stains. Watching these clips alongside this guide can make learning even smoother.
Model-Specific Instructions & Differences
Not all Bissell Little Green machines are the same. While the setup and basic use are similar, each model has unique features worth knowing. Here’s how they differ:
1. Little Green Max Pet
- Designed with pet owners in mind.
- Includes a pet stain tool and a SmartMix feature, which lets you adjust the formula strength for lighter cleaning or tough messes.
- If you’re cleaning pet accidents, always choose the stronger solution mix and follow with multiple suction passes to remove odor.
2. Little Green Pro / ProHeat
- Larger tank capacity—ideal for cleaning bigger spaces or multiple rooms without refilling.
- ProHeat models keep water warm longer, giving you better stain removal on carpets and upholstery.
- Expect slightly more weight, but also more consistent results on set-in stains.
3. Little Green HydroSteam
- Adds a steam mode that combines hot steam with cleaning solution.
- Wait for the steam-ready light before starting—usually one to two minutes.
- Steam is especially effective on old stains, sticky messes, or heavy traffic areas.
- Always test fabric in a hidden spot before steaming to avoid damage.
4. Cordless Little Green
- Runs on a rechargeable battery instead of plugging into the wall.
- Great for quick jobs or when you need to clean places far from outlets (like cars).
- Limited run time—usually 15–20 minutes per charge—so it’s best for small areas.
- Charge fully between uses for maximum performance.
5. Little Green Mini
- A smaller, lightweight version designed for ultra-portable cleaning.
- Best for quick touch-ups on upholstery, rugs, and car seats.
- Smaller tank capacity means more frequent refilling, but it’s easier to carry and store.
Use Cases & Practical Scenarios (Especially for New Parents)
The Bissell Little Green shines in real-life situations where messes happen fast and need quick attention. Here are some of the most common ways families, especially parents and pet owners, use it.
1. Baby/Toddler Spills (Milk, Juice, Formula)
Little ones are experts at tipping over bottles, cups, and food bowls. The Little Green quickly handles sticky juice or sour-smelling milk before it soaks deep into the carpet. Pre-treating with stain remover helps with tougher spots like formula.
2. Pet Accidents + Odor Cleanup
From puppy training mishaps to muddy paw prints, pets leave their mark. The Little Green Max Pet version is designed for these moments, but any model can remove stains and reduce lingering odors. Multiple suction passes are key for pulling out moisture that causes smells.
3. Stains on Nursery Carpets or Rugs
Nurseries often have soft rugs that absorb spills quickly. Since the Little Green uses warm water and safe solutions, it’s a parent-friendly choice for cleaning without harsh chemicals. Just make sure to check the rug’s cleaning code (W or WS).
4. Cleaning Upholstery, Car Seats, Strollers
Baby car seats, strollers, and high chairs collect crumbs and liquid spills constantly. The portable hose and small brush tool make it easy to clean these tight spots without hauling the whole item outside for scrubbing.
5. High-Traffic Play Areas
Playrooms and living rooms often see heavy use, which means ground-in dirt and food stains. The Little Green is perfect for small sections—just work one area at a time and do extra drying passes so kids can get back to playing sooner.
6. Seasonal Deep-Cleaning of Rugs and Small Carpets
Even if you don’t have daily messes, giving rugs and carpets a seasonal refresh keeps them looking new. Many parents use the Little Green every few months to deep-clean favorite play mats or entryway rugs where dirt builds up.
Conclusion
Using the Bissell Little Green is simple once you understand the basics: fill the clean tank, spray and scrub stains, suction up the dirty water, and clean the machine afterward. In short, you now know exactly how do you use a Bissell Little Green carpet cleaner—from setup to finish.
Consistent care and the right cleaning technique make all the difference. Whether you’re dealing with baby spills, pet accidents, or everyday messes, this portable cleaner can save time and keep your home fresh.
If you’re new to the Little Green, don’t worry—after a few tries, using it becomes second nature. Try the tips in this guide, check Bissell’s video resources for extra help, and enjoy a cleaner, fresher home.
FAQs
Can You Use Hot Water In A Little Green?
You can use warm tap water up to about 140 °F (60 °C). Avoid boiling water, as it may damage the machine’s plastic parts and seals.
How Much Formula Should You Use Per Fill?
Follow the fill lines on the clean water tank. Most models call for just a few ounces of solution per full tank. Some users find that even less (a teaspoon or two) still cleans well.
How Big An Area Can One Fill Cover?
A full tank usually covers a small-to-medium stain area or a few spot cleanings. It isn’t designed for whole rooms—think couches, car seats, or a section of carpet.
Can The Machine Clean Entire Room Carpets?
Technically yes, but it isn’t ideal. The Little Green is built for spot cleaning, not full-room deep cleaning. For large carpets, a full-size upright carpet cleaner is more efficient.
How Often Should You Deep Clean The Machine?
Rinse tanks, hose, and tools after every use. Do a more detailed cleaning (nozzles, brush head, hose flush) once a month if you use it regularly.
Where Can You Find Replacement Parts Or Manuals?
Bissell’s official support site offers replacement tanks, hoses, and accessories. It’s also where you’ll find official manuals.
How Do You Find The “Bissell Little Green Manual PDF”?
Search directly on Bissell’s support website by entering your model number. Each model has a downloadable PDF manual.
Are There Video Instruction Resources?
Yes—Bissell provides helpful instruction videos on their website and YouTube channel. These show setup, cleaning, and maintenance in action, which is great if you prefer visual learning.
Thanks for visiting Clearise Cleaning Services! Discover more helpful tips and expert cleaning insights by exploring our related categories.
Disclaimer: This article is intended for informational and educational purposes only. The instructions, tips, and troubleshooting steps provided are based on general usage guidelines, user experiences, and publicly available resources. Always refer to the official Bissell Little Green user manual for model-specific directions, safety information, and warranty details. The author and publisher are not responsible for any damage, misuse, or injury resulting from the application of this information. Use the product according to the manufacturer’s recommendations.