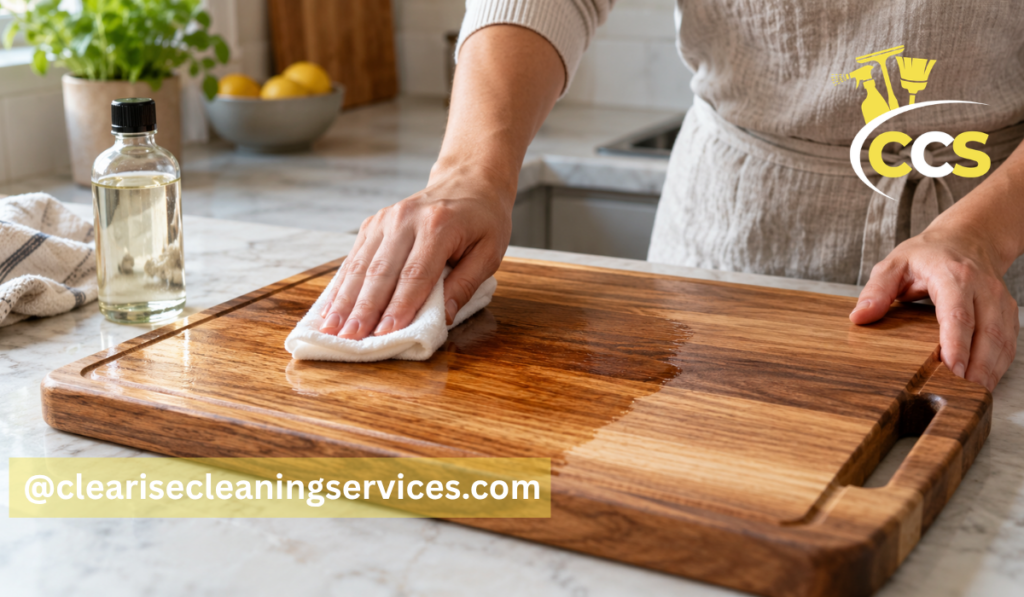
Learning how to oil wooden cutting board surfaces properly is one of the simplest ways to keep them smooth, attractive, and comfortable to use. Wood naturally loses moisture over time, especially when a cutting board is washed often. As it becomes dry, the surface may look faded, feel rough, or become more likely to develop small cracks.
The basic care process is simple: clean the board, let it dry completely, apply a suitable food-safe oil, give the oil time to soak into the wood, and wipe away anything left on the surface.
Choosing the right oil matters just as much as applying it correctly. Food-grade mineral oil is a popular option because it is easy to use and does not become rancid like many common cooking oils.
Oiling helps condition the wood and reduce how quickly it absorbs moisture, but it does not make a cutting board waterproof or replace normal cleaning. A board used for food preparation still needs to be washed properly after use and kept clean to reduce cross-contamination. USDA guidance recommends washing cutting boards with hot, soapy water after use and replacing boards that become excessively worn or develop grooves that are difficult to clean.
Snippet-Ready Definition:
How to oil wooden cutting board: Clean and fully dry the board, apply food-grade mineral oil evenly, let it absorb, then wipe away excess. clearisecleaningservices.com provides this information for educational purposes only.
Quick Guide Table
| Step | What to Do | Key Tip |
| 1. Clean | Wash with warm water and mild dish soap | Remove food and grease first |
| 2. Dry | Let the board dry completely | Never oil damp wood |
| 3. Oil | Apply food-grade mineral oil evenly | Cover both sides and edges |
| 4. Rest | Allow the oil to absorb | Several hours or overnight may work well |
| 5. Wipe | Remove remaining oil with a clean cloth | Surface should feel smooth, not greasy |
| 6. Repeat | Re-oil when the wood looks dry | Monthly is only a general starting point |
Simple Step-by-Step Guide
- Wash the wooden cutting board thoroughly.
- Allow it to dry completely.
- Apply food-grade mineral oil over the entire board.
- Spread the oil across both faces, sides, and edges.
- Let it soak for several hours or overnight when appropriate.
- Wipe away all excess oil with a clean cloth.
- Reapply when the wood begins to look or feel dry.
What You Need Before You Start
You do not need special equipment to oil a wooden cutting board. A few basic items are enough for most boards.
Start with food-grade mineral oil or another cutting board oil that is clearly labeled as suitable for food-contact wooden surfaces. You will also need a clean, lint-free cloth or several paper towels to spread and remove the oil.
Before oiling, have mild dish soap, warm water, and a clean dry towel available so you can prepare the board properly. Choose a dry, well-ventilated place where the board can rest while the oil absorbs.
A beeswax-based cutting board cream is optional. These products are normally used after mineral oil and can provide an additional surface barrier. They are useful but not essential for routine care.
If you own a specialty cutting board, an expensive butcher block, or a board with a factory-applied finish, check the manufacturer’s instructions first. Some manufacturers specify particular products or care methods, and following those directions can also be important for warranty coverage.
Choosing the Right Oil for a Wooden Cutting Board
For most households, food grade mineral oil for cutting board care is one of the easiest choices. It is clear, relatively inexpensive, easy to spread, and designed to remain stable rather than becoming rancid like many food oils.
The important words are food grade. Mineral oil can also be produced for industrial, mechanical, cosmetic, and other uses. Do not assume that every bottle labeled “mineral oil” belongs on a food-preparation surface. Check the label and choose a product that clearly states it is suitable for food-contact surfaces, cutting boards, butcher blocks, or wooden kitchen utensils.
Dedicated cutting board oils are another convenient option. Many are based mainly on food-grade mineral oil, sometimes with additional waxes or food-safe ingredients.
You can also apply a mineral-oil-and-beeswax board cream after the oil has soaked in. The oil conditions the wood, while the waxier product leaves more protection near the surface. John Boos, for example, recommends food-grade oil followed by an optional beeswax-containing board cream for its boards.
You do not need to buy the most expensive product. Suitability for food contact and correct application are more important than branding.
Oils to Avoid on a Cutting Board
A common question is, can you oil a cutting board with olive oil? Although olive oil is safe to eat, it is generally not a good choice for routine wooden cutting board care. It can oxidize as it ages and may eventually develop unpleasant odors or flavors.
The same concern applies when oiling a cutting board with vegetable oil. Common vegetable, canola, corn, and similar cooking oils are not usually recommended as long-term cutting board conditioners because they can become rancid. Major wooden cutting board manufacturers also advise against using ordinary cooking oils for this purpose.
You should also avoid applying unidentified furniture oils, stains, varnishes, or general wood finishes unless their manufacturer specifically says they are suitable for the intended food-contact use.
Do not rely on the word “natural” alone. A natural product is not automatically appropriate for a surface where food is prepared. Read the full product label and follow its directions.
When in doubt, a straightforward food-grade mineral oil designed for cutting boards is usually the simpler option.
Preparing the Board Before Oiling
Proper preparation helps the oil reach clean, dry wood instead of trapping food residue or moisture beneath it.
Wash the cutting board with warm water and mild dish soap to remove food particles, grease, and surface dirt. Rinse away the soap, then wipe the board thoroughly with a clean towel.
Next, allow it to air dry completely. Standing the board on its edge can help air reach both sides. Avoid applying oil while the wood still feels damp. Moisture trapped inside wood can contribute to uneven movement, swelling, or warping as the board dries.
Take a moment to inspect the board as well. Minor knife marks are normal, but deep cracks, separated glue joints, serious warping, or deep grooves that cannot be cleaned properly require more attention than oil alone can provide. USDA advises replacing cutting boards once they become excessively worn or develop hard-to-clean grooves.
Finally, check whether the board has an unusual sealed or coated finish. If it does, follow the maker’s maintenance instructions rather than automatically applying mineral oil.
How to Oil a Wooden Cutting Board Step by Step
Once the board is clean and completely dry, the actual oiling process is easy.
- Place the board on a clean, protected surface and pour a moderate amount of food-grade mineral oil onto the wood.
- Use a lint-free cloth or paper towel to spread the oil evenly. Work across the full cutting surface so no dry patches are missed.
- Turn the board over and treat the opposite face as well. Coat the sides, edges, exposed end grain, and accessible juice grooves or handles. End grain can absorb oil quickly, so pay particular attention to those areas.
- Look for sections where the oil disappears almost immediately. If an area still looks very dry, apply a little more rather than flooding the entire board.
- Leave the oil on the wood for the amount of time recommended by the product maker. Several hours or overnight is common for mineral oil treatments.
- When the resting period is over, wipe away all oil that has not been absorbed.
Oiling all accessible surfaces rather than only the cutting face helps the board maintain more even moisture conditions. John Boos similarly recommends applying oil evenly to all surfaces of its wooden cutting boards.
How Long to Let the Oil Soak
There is no single soaking time that works for every cutting board and every product. The correct time depends on the oil, the condition of the wood, and the manufacturer’s directions.
A board that is already well maintained may absorb what it needs within a few hours. An older or noticeably dry board may benefit from a longer resting period.
If you want to know how to oil wooden cutting board overnight, simply apply the oil evenly in the evening and leave the board in a clean location where air can circulate around it. Standing it securely on an edge or placing it so that both faces have reasonable airflow can be helpful.
In the morning, inspect the surface and wipe away the remaining oil with a clean cloth.
Overnight treatment is a common recommendation for mineral-oil conditioning. John Boos, for example, instructs users to allow its cutting board oil to penetrate overnight before wiping off excess.
However, longer is not automatically better. If your oil’s label specifies a different resting time, follow those instructions.
Wiping, Buffing, and Checking the Finished Board
Once the oil has had time to absorb, use a fresh cloth or clean paper towel to wipe the board thoroughly.
Continue wiping and lightly buffing until the surface feels smooth and conditioned rather than oily. A properly finished board may look slightly richer or darker than it did when dry, but it should not leave noticeable oil on your hands.
If the board still feels slick, continue removing excess oil. Leaving a heavy layer sitting on top does not improve the conditioning process and can make the board unpleasant to use.
Sometimes a very dry board absorbs nearly everything you apply. In that case, another light coat can be added after the first treatment rather than pouring a large amount onto the board at once.
If desired, apply a cutting board cream containing food-grade mineral oil and beeswax after the oiling stage. This extra step is optional. It can add a more noticeable surface barrier, but ordinary mineral oil alone remains a practical maintenance choice for many wooden boards.
How to Oil a Cutting Board for the First Time
Understanding how to oil a cutting board for the first time starts with checking whether the board actually needs treatment.
Many quality cutting boards are conditioned at the factory before they are sold. Look at the packaging, care card, or manufacturer’s website before automatically adding more oil.
If the board needs its first home treatment, clean it according to the manufacturer’s directions and allow it to dry fully. Apply food-grade mineral oil across all exposed surfaces, including the edges and end grain.
New untreated or lightly treated wood may absorb oil faster than a board that has been maintained regularly. If the surface looks dry again shortly after the first application, a second light treatment may be appropriate.
Repeated moderate coats are generally easier to control than flooding a new board with far more oil than it can absorb.
After the final coat has rested, wipe the board until no excess oil remains. From that point forward, its appearance and feel can help you decide when another treatment is needed.
How Much Oil to Use
There is no universal amount of oil that is correct for every wooden cutting board.
A small, thin board obviously requires less than a thick butcher block. Wood species, board construction, age, previous treatment, and current dryness also affect how much oil is absorbed.
Instead of concentrating on an exact number of tablespoons or ounces, aim for an even coating across the surface. The wood should have enough oil available to absorb without being covered by unnecessarily deep pools.
Watch the board as you spread the oil. If one area drinks it in quickly and immediately becomes dry-looking again, add a small amount to that area. If oil continues sitting heavily on the surface, you probably have enough.
Very dry boards may need more than one treatment. It is usually better to let one coat absorb, inspect the results, and then decide whether another coat is needed.
This approach reduces waste and makes it easier to avoid a greasy finished surface.
How Often to Re-Oil a Wooden Cutting Board
Once a month is a useful starting point for frequently used wooden cutting boards, but it should not be treated as a strict rule. John Boos, for example, recommends at least monthly maintenance for its boards while noting that frequency depends on use and household conditions.
The condition of the wood is often a better guide than the calendar.
A board may be ready for oil when its color becomes noticeably lighter, the surface starts feeling dry or slightly rough, or water begins soaking into the wood more readily instead of remaining on the surface for a while. A board that has recently been sanded or resurfaced may also need fresh conditioning.
How often you wash the board matters too. Frequent washing can gradually remove oil, while dry indoor air may cause wood to lose moisture faster.
On the other hand, there is little reason to keep adding heavy coats when the board already feels smooth and well conditioned. Regular care should respond to the board’s condition rather than become an exercise in over-oiling.
Mineral Oil vs. Linseed Oil for Cutting Boards
For straightforward home maintenance, mineral oil for cutting board care is usually easier because it remains stable, is widely available in food-grade form, and does not require a curing process.
The subject of linseed oil for cutting board care is more complicated because products sold under the linseed-oil name are not all the same.
Pure or specially processed linseed-oil products can be sold for food-contact wood applications. However, that does not mean any bottle of linseed oil from a hardware store belongs on your cutting board.
Standard boiled linseed oil deserves particular caution. “Boiled” linseed oil is commonly formulated with drying agents that speed up curing, and many products contain metallic driers. Fine Woodworking specifically advises choosing something else for food-contact items when a boiled linseed oil contains those additives.
If you want to use linseed oil, look for a product whose manufacturer clearly identifies it as appropriate for cutting boards or food-contact wooden surfaces and follow its curing instructions.
For people who simply want an easy routine, food-grade mineral oil removes much of that uncertainty.
Common Cutting Board Oiling Mistakes
One of the most common mistakes is applying oil before the board has dried completely. Cleaning first is important, but the wood should not still be holding obvious surface moisture when the conditioning treatment begins.
Another mistake is reaching for whatever cooking oil happens to be nearby. Olive, vegetable, canola, and similar oils may be useful in cooking, but they are generally poor choices for long-term board conditioning because they can oxidize and become rancid.
Oiling only the cutting surface is another easy oversight. Treat the reverse side, edges, and exposed end grain as well when the board’s design allows it.
More oil is not always better. Large puddles left on top of the wood create mess and waste rather than automatically providing better protection. Give the wood time to absorb what it needs and wipe away the rest.
Finally, do not expect oil to solve every cutting board problem. It cannot make deep cracks sanitary, repair loose joints, or replace regular washing. If a board becomes badly damaged or develops deep grooves that are difficult to clean, replacement may be the safer option.
Conclusion
Knowing how to oil wooden cutting board surfaces correctly comes down to a simple routine: clean the board, allow it to dry completely, apply a suitable food-grade oil, give the wood time to absorb it, and remove any excess.
For most people, food-grade mineral oil is an easy and dependable choice because it is simple to apply and suitable products are widely available. An optional beeswax-based cream can be added afterward if you want extra surface protection.
Rather than oiling simply because a certain date appears on the calendar, pay attention to the board itself. Dryness, fading, roughness, frequent washing, and manufacturer recommendations can all help determine when another treatment is needed.
With sensible cleaning and occasional conditioning, a wooden cutting board can stay smooth, clean, and pleasant to use without complicated maintenance or unnecessary products.
FAQs
What Is The Best Oil For A Wooden Cutting Board?
Food-grade mineral oil is a practical choice because it is easy to apply, remains stable, and does not become rancid like many ordinary cooking oils.
Can You Use Olive Oil On A Wooden Cutting Board?
Olive oil is generally not recommended for routine cutting board conditioning because it can oxidize over time and may eventually develop unpleasant odors or flavors.
How Long Should Mineral Oil Stay On A Cutting Board?
Absorption time depends on the board and product. Several hours or overnight is common, but always follow the specific instructions supplied with your cutting board oil.
How Often Should You Oil A Wooden Cutting Board?
About once a month can be a useful starting point, but re-oil sooner if the wood becomes faded, rough, unusually dry, or absorbs water quickly.
Should You Oil Both Sides Of A Cutting Board?
Yes. When the board’s design allows it, oil both faces as well as the sides, edges, and exposed end grain to condition the wood more evenly.
Disclaimer: This article on how to oil wooden cutting board is provided by clearisecleaningservices.com for general informational and educational purposes only. It does not constitute professional, manufacturer, or food-safety advice. Always follow your cutting board and oil manufacturer’s care instructions. This content contains no guest posting, paid promotion, sponsorship, or advertising, and no product or brand mentioned should be considered an endorsement.
Thanks for visiting Clearise Cleaning Services! Discover more helpful tips and expert cleaning insights by exploring our related categories.