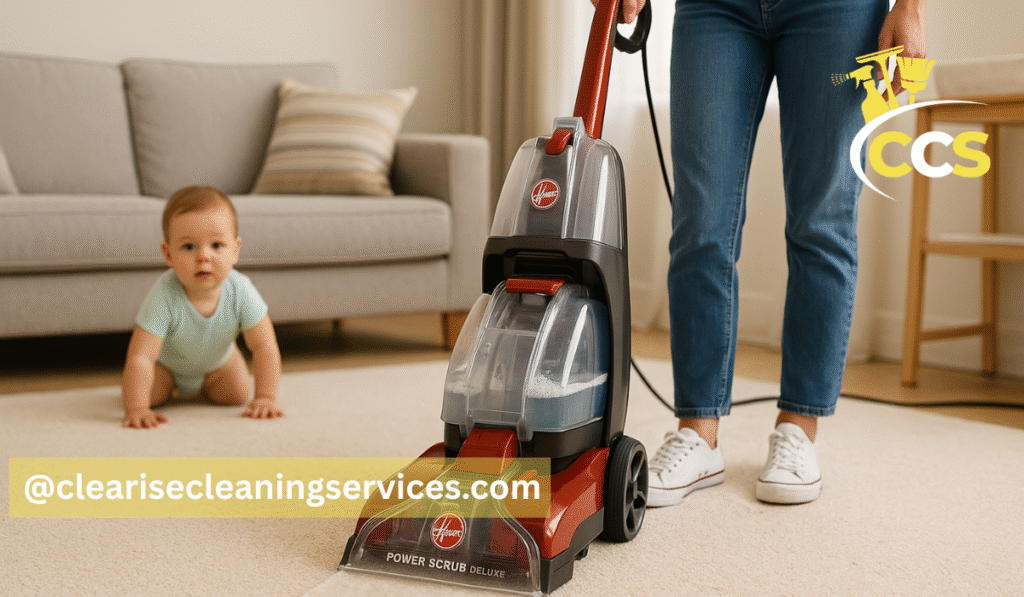
When you live in a busy household—especially with babies, toddlers, or pets—keeping carpets clean feels like a never-ending task. Crumbs, milk spills, muddy paw prints, and everyday dust all seem to find their way deep into the fibers. That’s where a Hoover carpet cleaner comes in. It’s not just another household gadget; it’s a practical solution trusted by families who want fresh, hygienic floors without calling in a professional every month.
Learning how to use a Hoover carpet cleaner properly makes all the difference. Used the right way, it can extend the life of your carpets, improve indoor air quality, and prevent issues like mold or mildew that sometimes come from improper cleaning. Plus, knowing the right techniques saves time and ensures that you’re not just cleaning the surface but pulling out dirt from deep within the fibers.
In this guide, I’ll walk you through the step-by-step process of using a Hoover carpet cleaner effectively. You’ll also pick up some expert-backed tips, learn about common mistakes to avoid, and see how to handle different Hoover models—from the compact PowerDash to the feature-rich SmartWash. By the end, you’ll feel confident enough to make your carpets look and feel almost new again.
Understanding Your Hoover Model: Key Features & Terminology
Before you switch on your Hoover carpet cleaner, it helps to know your machine inside and out. While most models follow a similar principle—dispensing cleaning solution, scrubbing fibers, and extracting dirty water—each Hoover cleaner comes with its own features, attachments, and settings. Understanding these details ensures you get the best results without damaging your carpet.
Different Hoover Models
Hoover offers a variety of carpet cleaners designed for different needs:
- Hoover PowerDash & PowerDash Pet: Compact, lightweight, and ideal for quick clean-ups or smaller homes. The “Pet” version is designed to tackle hair and pet-related messes.
- Hoover Power Scrub Deluxe: A versatile cleaner that balances power with convenience, great for medium to large households.
- Hoover SmartWash: An advanced model with automatic features—dispensing the right amount of solution and switching between wash and dry with minimal effort.
- Hoover SteamVac: Uses heated cleaning technology, giving a deeper clean for stubborn dirt and stains.
- Hoover SpinScrub 50: Features counter-rotating brushes that scrub fibers from multiple angles, loosening embedded dirt.
- Hand Tool Attachments: Found on many models, these tools allow you to clean stairs, upholstery, and car interiors effectively.
“Wash” vs “Rinse” Modes
One key feature in many Hoover models is the ability to switch between wash mode and rinse mode:
- Wash Mode: Dispenses water mixed with cleaning solution and scrubs the carpet fibers.
- Rinse Mode: Uses plain water only to flush out any remaining detergent, preventing residue buildup that can attract more dirt later.
Knowing when to switch between these two modes helps keep your carpet truly clean and free from sticky residue.
Attachments & Brushes
Hoover cleaners often come with a range of attachments that make cleaning more targeted:
- SpinScrub brushes: Ideal for deep cleaning in high-traffic areas.
- Crevice tools: Reach into corners, edges, and tight spots where the main brush cannot.
- Upholstery or hand tools: Perfect for fabric sofas, car seats, or staircases.
Using the right attachment for the right surface not only saves time but also improves cleaning results.
Tank Types
Most Hoover machines have separate tanks for different purposes:
- Clean Water Tank: Holds fresh water (and sometimes solution).
- Dirty Water Tank: Collects the extracted water mixed with dirt.
- Solution/Detergent Tank: On some models, this is separate, while on others it mixes with the clean water tank.
Always make sure tanks are correctly filled and locked in place before starting. Misplacing even one can reduce suction and leave carpets too wet.
Preparing the Carpet Before Cleaning
A Hoover carpet cleaner works best when the carpet is properly prepared. Think of it like prepping ingredients before cooking—the better the preparation, the smoother the results. Skipping this stage often leads to carpets staying damp too long, dirt being pushed deeper into the fibers, or stains not lifting completely. Here’s how to get your carpet ready the right way.
Vacuum Thoroughly First
Before running the Hoover, always vacuum the carpet. This step removes loose dust, crumbs, pet hair, and debris that could otherwise clog the machine or get ground deeper during wet cleaning. A good vacuuming also fluffs up the fibers, making it easier for the Hoover to reach hidden dirt.
Spot-Treat Stains
Households with babies and pets know the struggle—spit-ups, spilled juice, muddy paw prints, or even marker stains on the carpet. While a Hoover carpet cleaner is effective, heavily soiled spots often benefit from pre-treatment.
- Use a stain remover recommended for carpets or a Hoover-approved pre-treat spray.
- Apply a small amount directly to the stain and let it sit for a few minutes.
- For sensitive carpets, always test the solution on a hidden corner first to check for color fading.
Protect Furniture and Baseboards
Carpet cleaning involves moisture, and it’s easy for edges and wooden furniture legs to soak up water. Protect them with foil, plastic sheets, or even small plastic bags tied around chair legs. This prevents water damage and staining.
Ensure Proper Ventilation
Good airflow helps with quicker drying. Open windows or turn on fans before starting. For new parents especially, reducing drying time is essential to keep little ones away from damp carpets that can harbor bacteria or mold.
Prepare the Room Layout
Move lightweight furniture out of the way and plan your cleaning path. Start from the farthest corner of the room and work your way toward the exit. This way, you don’t end up walking across wet carpet after cleaning.
Filling & Setting Up the Hoover Cleaner
Once your carpet is prepped, it’s time to get the Hoover carpet cleaner ready for action. Setting up the machine correctly is crucial—not only for effective cleaning but also for preventing issues like detergent buildup, leaks, or carpets staying too wet. Here’s a step-by-step breakdown.
Choose the Right Cleaning Solution
Most Hoover carpet cleaners work best with Hoover-branded carpet cleaning solution. These formulas are designed to create minimal foam, rinse out easily, and protect carpet fibers. While it might be tempting to use dish soap or laundry detergent, those products can leave sticky residues that attract more dirt over time. If you prefer a gentler approach (especially with babies or pets around), look for Hoover’s pet-safe or fragrance-free solutions.
Fill the Clean Water Tank
- Remove the clean water tank from the machine.
- Fill it with warm tap water—not hot or boiling, since extreme heat can damage carpet fibers.
- Add the recommended amount of carpet solution. Hoover tanks usually have fill lines marked for both water and detergent, so measure carefully.
Check the Dirty Water Tank
Before you begin, ensure the dirty water tank is empty, properly attached, and locked in place. This prevents suction loss and stops dirty water from leaking back into your carpet.
Attach Brushes and Nozzles
Depending on your model, you may have rotating brushes, SpinScrub attachments, or handheld tools. Attach the right one for the job:
- Main nozzle/brush for large floor areas.
- Hand tool for stairs, upholstery, or tight corners.
- Crevice tool for edges and along baseboards.
Select Wash or Rinse Mode
Many Hoover models (like the Power Scrub or SmartWash) have a dial or lever to switch between Wash and Rinse modes:
- Start in Wash Mode to apply solution and scrub.
- Switch to Rinse Mode at the end to flush out leftover detergent with plain water.
Power and Safety Check
- Plug the machine into a grounded outlet.
- Make sure the cord is clear of your cleaning path.
- Double-check that all tanks and lids are securely in place before turning the machine on.
With everything assembled and filled correctly, your Hoover is ready to bring those carpets back to life.
Step-by-Step: How to Use a Hoover Carpet Cleaner
Now that your carpet is prepped and your machine is ready, it’s time to start cleaning. Using a Hoover carpet cleaner isn’t complicated, but the right technique ensures your carpets dry faster, look fresher, and last longer. Here’s the professional step-by-step method I use in homes every day.
Step 1: Start with a Test Area
Always begin by cleaning a small, hidden patch of carpet—like behind a door or under a piece of furniture. This helps confirm that your carpet is colorfast and reacts well to the cleaning solution.
Step 2: Begin in Wash Mode
- Place the machine at the farthest corner of the room.
- Press the trigger to release solution and slowly push the Hoover forward in a straight line.
- On the same line, pull the machine backward with the trigger released to allow suction to lift dirt and moisture.
Step 3: Use Overlapping Strokes
Work in straight rows with a slight overlap, just like mowing a lawn. This ensures you don’t leave strips of uncleaned carpet behind.
Step 4: Tackle High-Traffic Spots
For stubborn areas—like entryways, play zones, or pet resting spots—make an extra pass. Some Hoover models allow you to hold the trigger longer to apply more solution, but avoid soaking the carpet too much.
Step 5: Switch to Rinse Mode
After cleaning a section of the carpet, switch to Rinse Mode (plain water only). Go over the same rows again to remove leftover detergent. This step prevents sticky residue that attracts new dirt quickly.
Step 6: Use Attachments for Special Areas
- Hand tool: Great for stairs, sofas, or car interiors.
- Crevice tool: Ideal for edges, corners, and along baseboards.
- SpinScrub attachments: Perfect for lifting ground-in dirt from thicker pile carpets.
Step 7: Monitor the Dirty Water Tank
Your Hoover’s dirty water tank will fill faster than you expect, especially in homes with pets or toddlers. Empty it as soon as it reaches the max fill line, then refill the clean water tank before continuing.
Step 8: Final Extraction Pass
When the carpet looks clean, go over it once more without pressing the trigger—just suction. This “dry pass” removes extra moisture and helps carpets dry quicker.
Step 9: Allow Proper Drying
After finishing, keep windows open or use fans/dehumidifiers to speed up drying. Avoid heavy foot traffic until the carpet is fully dry to prevent resoiling.
How Much Moisture Is OK & Drying Tips
One of the most common mistakes people make with carpet cleaners is using too much water. While it may seem like more water means a deeper clean, over-wetting a carpet can actually do more harm than good. The key with a Hoover carpet cleaner is balancing effective cleaning with proper moisture control.
Avoiding Over-Saturation
Carpet fibers can only handle so much moisture before problems begin:
- Too much water can seep into the carpet padding and even the subfloor, leading to mold, mildew, or bad odors.
- Over-wet carpets also take much longer to dry, increasing the chance of resoiling as dust settles on damp fibers.
- You’ll know you’ve used too much water if the carpet feels squishy or takes more than 24 hours to dry.
Professional Rule of Thumb
When using a Hoover carpet cleaner, think “lightly damp, not soaked.” After a proper cleaning pass, the carpet should feel slightly damp to the touch, not dripping wet. The dirty water tank should be filling steadily, showing that suction is pulling most of the water back out.
Drying Techniques for Faster Results
- Make Dry Passes: After each section, go over the area again without pressing the trigger. This maximizes water extraction.
- Open Windows & Doors: Fresh airflow speeds up evaporation and reduces musty odors.
- Use Fans or Dehumidifiers: Position a standing fan or box fan toward the carpeted area, or run a dehumidifier to pull moisture from the air.
- Turn On HVAC Systems: Air conditioning or heating (depending on season) helps maintain airflow and consistent drying.
- Block Off the Area: Keep kids, pets, and furniture off the damp carpet until it’s fully dry. This avoids footprints, indentations, and dirt transfer.
How Long Should Carpets Take to Dry?
With proper Hoover use and good airflow, carpets usually dry within 6 to 12 hours. In humid environments or when heavy water is used, it may take closer to 24 hours. If drying is taking longer, it’s a sign the carpet was over-saturated.
Special Use Cases & Expert-Backed Tips
Every household is different, and so are the challenges carpets face. As a professional carpet cleaner, I’ve seen it all—from baby food ground into plush rugs to muddy paw prints on cream carpets. Here are some expert-backed tips to get the most out of your Hoover carpet cleaner in special situations.
Cleaning with Babies and Pets Around
- Safe Solutions: Always use Hoover-approved or non-toxic cleaning solutions. Babies spend a lot of time crawling on the carpet, and pets often lick surfaces, so low-VOC, fragrance-free, or pet-safe formulas are best.
- Quick Drying Is Essential: Damp carpets can harbor bacteria and odors. If you have kids or pets, use extra “dry passes” with your Hoover to remove more water. Consider running a fan immediately after cleaning.
- Frequent Spot Cleaning: For small messes (like milk spills or accidents), use the hand tool with plain water and a little solution instead of waiting for a full clean.
Tackling High-Traffic Areas
Entryways, living rooms, and play zones often hold the most dirt. To keep them looking fresh:
- Make extra passes with the Hoover in these zones.
- Use a pre-treatment spray before cleaning to loosen stubborn grime.
- Rotate the direction of your passes (north-south, then east-west) so the brushes scrub fibers from multiple angles.
For Delicate Carpets or Rugs
Not all carpets respond well to aggressive cleaning. Wool rugs, silk blends, or handwoven pieces need special care:
- Use the gentlest setting on your Hoover and avoid harsh solutions.
- Clean only the surface with minimal moisture, focusing on suction rather than heavy washing.
- Always check the manufacturer’s care tag before using a carpet cleaner on delicate rugs.
Handling Specific Stains Like a Pro
- Food & Drink: Dab (never rub) the area with a cloth first, then use the Hoover hand tool with extra solution.
- Pet Accidents: Pre-treat with an enzyme-based cleaner before running the Hoover to neutralize odor.
- Crayon, Makeup, or Ink: Apply a carpet-safe stain remover before using the machine. Avoid over-wetting—these stains need patience, not floods of water.
- Mud: Let it dry, vacuum it up, then go over with the Hoover. Cleaning wet mud often just spreads it.
Upholstery, Stairs, and Cars
Don’t forget that Hoover isn’t just for carpets:
- Use the upholstery tool to refresh sofas, cushions, or baby chairs.
- The hand tool is perfect for stairs—small enough to handle steps without dragging the machine.
- For car interiors, Hoover attachments can revive seats and floor mats, making them look nearly new.
How to Use Specific Hoover Models / Versions
While the general cleaning process is similar across Hoover machines, each model comes with features that make it unique. Knowing how to use your specific model ensures you’re getting the best results while avoiding common mistakes.
How to Use Hoover PowerDash / PowerDash Pet Carpet Cleaner
- Best for: Small apartments, quick clean-ups, and homes with pets.
- Setup: Fill the clean water tank with warm water and solution up to the marked line.
- Operation: Move slowly in straight lines, pressing the trigger for wash strokes and releasing it for suction strokes.
- Pro Tip: Since the tank is smaller, expect to refill more often. Always do an extra dry pass to prevent pet odors from lingering.
How to Use Hoover Power Scrub Deluxe
- Best for: Medium to large households with high-traffic areas.
- Setup: Dual tanks for clean and dirty water make it easy to monitor your progress.
- Operation: Use the Wash/Rinse selector—first in Wash mode with solution, then Rinse mode with plain water.
- Pro Tip: Its SpinScrub brushes work well on deeper pile carpets, but avoid pressing down too hard—let the brushes do the scrubbing.
How to Use Hoover SmartWash
- Best for: Families who want a hands-free, intuitive cleaning process.
- Setup: Just fill the clean tank—SmartWash automatically mixes the right ratio of solution and water.
- Operation: Push forward to wash, pull back to dry. No separate trigger needed.
- Pro Tip: Use the Auto Dry feature at the end of each section for faster drying, especially in rooms where kids play.
How to Use Hoover SteamVac
- Best for: Stubborn dirt and stains.
- Setup: Fill with water and solution as usual, but this model also heats the water slightly for extra cleaning power.
- Operation: Multiple brush speeds allow you to adjust cleaning intensity. Use high speed for tough messes and low speed for delicate areas.
- Pro Tip: Great for deep seasonal cleans, but avoid frequent use on delicate rugs as heat can stress fibers.
How to Use Hoover SpinScrub 50
- Best for: Homes needing multi-angle cleaning.
- Setup: Standard fill process with separate tanks.
- Operation: The counter-rotating brushes lift dirt from all sides of carpet fibers. Perfect for uneven wear or older carpets.
- Pro Tip: Use slower passes in high-traffic zones to give brushes more time to work.
How to Use Hoover Carpet Cleaner Hand Tool & Attachments
- Best for: Stairs, upholstery, and cars.
- Setup: Attach the hose and chosen tool securely before turning on the machine.
- Operation: Hold the tool firmly, press the trigger to release solution, and pull backward for suction.
- Pro Tip: Keep strokes short and controlled—too much solution in a small spot can over-wet fabrics.
Maintenance: After-Use Care & Best Practices
A Hoover carpet cleaner does a lot of heavy lifting, so giving it proper care after each use is essential. Skipping maintenance not only shortens the machine’s lifespan but also leaves behind odors, clogs, and poor suction the next time you clean. Here’s how to keep your Hoover in top shape like a professional.
Empty & Rinse the Dirty Water Tank
- Always start by detaching the dirty water tank and dumping the contents down a drain or toilet.
- Rinse the tank thoroughly with warm water. Leftover dirty water can create unpleasant smells or even mold growth if stored.
Clean the Brushes & Nozzles
- Remove the brush head (SpinScrub or PowerBrush, depending on your model).
- Rinse under warm water to remove carpet fuzz, hair, and debris.
- Check the nozzles for any blockages—clogs reduce suction power. Use a small cleaning brush or toothpick if needed.
Wipe Down the Exterior
- Use a damp cloth to wipe away spills, drips, or detergent streaks from the machine body.
- Keeping the exterior clean prevents build-up that could damage switches or vents over time.
Check & Clean Filters
Some Hoover models have washable filters. If your machine does, remove and rinse the filter with warm water, then let it dry completely before reinserting. A clogged filter restricts airflow and weakens performance.
Let Parts Air Dry Before Storing
- Leave tanks, brushes, and attachments out to air dry for at least an hour before reassembling.
- Storing the machine with moisture inside can lead to mildew and foul odors.
Proper Storage
- Store your Hoover upright in a cool, dry place.
- Avoid wrapping the power cord tightly around the machine while it’s damp—this can cause cracking or electrical issues over time.
Regular Maintenance Schedule
- After Every Use: Empty tanks, rinse brushes, and wipe down the machine.
- Monthly: Check hoses and attachments for clogs or leaks.
- Every Few Months: Deep clean removable parts with mild soap and warm water to remove detergent build-up.
- Annually: Inspect for wear-and-tear—especially belts, seals, and brushes—and replace if needed.
Keeping your Hoover maintained means it will perform like new for years, saving you money and frustration.
Common Mistakes New Parents Make & How to Avoid Them
As a professional carpet cleaner, I’ve noticed that many new parents—juggling the chaos of kids, pets, and daily life—often make the same errors when using a Hoover carpet cleaner. These mistakes can leave carpets wetter than they should be, attract dirt back faster, or even damage the carpet fibers. Here’s what to watch out for and how to avoid it.
Using Too Much Solution
- The Mistake: Pouring extra detergent into the tank, thinking it will clean better.
- The Problem: Too much soap leaves residue in carpet fibers, which attracts dust and dirt more quickly.
- The Fix: Always follow the fill lines on your Hoover tank and use the recommended amount of cleaning solution.
Over-Wetting the Carpet
- The Mistake: Going over the same spot repeatedly with the trigger pressed.
- The Problem: Excess water seeps into the carpet padding, increasing drying time and creating a risk of mold.
- The Fix: Use controlled wash strokes and balance them with suction-only “dry passes” to pull moisture back out.
Skipping the Rinse Mode
- The Mistake: Cleaning only with solution and not rinsing afterward.
- The Problem: Detergent residue remains in the carpet, making it sticky and prone to re-soiling.
- The Fix: After washing, switch to rinse mode with plain water and do at least one full pass over the cleaned areas.
Ignoring Attachments
- The Mistake: Only using the main cleaner head, even for stairs, upholstery, or corners.
- The Problem: Dirt builds up in edges and fabrics that the main head can’t reach.
- The Fix: Use the Hoover hand tool or crevice tool for these tricky areas.
Not Emptying Tanks Promptly
- The Mistake: Leaving dirty water sitting in the tank after use.
- The Problem: Stale odors, bacteria growth, and poor suction next time you clean.
- The Fix: Always empty and rinse tanks right after finishing.
Walking on Damp Carpets
- The Mistake: Letting kids or pets walk over freshly cleaned carpets.
- The Problem: Damp fibers attract dirt quickly, undoing all your hard work.
- The Fix: Block off the cleaned area until it’s fully dry (6–12 hours on average).
By avoiding these mistakes, new parents can keep carpets cleaner for longer while ensuring a safe and healthy environment for their little ones.
Safety & Health Tips For New Parents
When you’re using a Hoover carpet cleaner in a home with little ones or pets, safety and health should always come first. Babies crawl, toddlers touch everything, and pets love rolling on fresh carpet—so the way you clean makes a real difference. Here are professional tips to keep your family safe while still getting spotless floors.
Choose Non-Toxic Cleaning Solutions
Many store-bought carpet shampoos are heavily fragranced or contain strong chemicals. While they clean effectively, they may not be ideal around babies. Instead:
- Use Hoover-approved, pet- and child-safe formulas whenever possible.
- Look for low-VOC (volatile organic compounds) and fragrance-free options to reduce indoor air pollution.
Ensure Good Ventilation
- Always open windows or use fans while cleaning. This helps remove fumes from solutions and speeds up drying.
- Good airflow also reduces the risk of mold or mildew developing under damp carpets.
Keep the Machine & Cords Out of Reach
- While cleaning, ensure babies and toddlers are not in the same room.
- Hoover machines have strong suction and moving parts—never let children play with them.
- Secure cords to avoid tripping hazards.
Don’t Rush the Drying Stage
- Walking on damp carpet transfers dirt and bacteria back into the fibers.
- Keep play areas blocked off until carpets are completely dry—usually 6–12 hours.
- If possible, clean carpets in the evening so they dry overnight while kids are asleep.
Check Manufacturer’s Instructions
Carpet fibers vary. Some delicate materials (like wool) require gentler cleaning or specific solutions. Always check the care label before running your Hoover cleaner.
By combining proper cleaning techniques with safe products and a little extra caution, new parents can maintain a home that’s both clean and healthy for children and pets.
Cost & Efficiency Tips
Using a Hoover carpet cleaner doesn’t have to be expensive or time-consuming. With the right habits, you can stretch your cleaning solution further, cut down on electricity use, and still keep your carpets looking fresh. Here are some pro-level tips for new parents who want the best results without overspending.
Use the Right Amount of Solution
It’s tempting to pour in extra soap, especially when carpets look heavily soiled. But more detergent doesn’t equal cleaner results—it usually just leaves sticky residue. Stick to Hoover’s recommended measurements. This saves money on solution and prevents carpets from re-soiling faster.
Spot-Clean Between Deep Cleans
Instead of running a full cleaning session every time your toddler spills juice or the dog tracks in mud, use the hand tool or spot-cleaning feature. Quick touch-ups reduce the need for frequent full cleans, cutting down on water and solution usage.
Plan Cleaning Sessions Strategically
- Clean multiple rooms in one go to make the most of a single tank of solution.
- Schedule deep cleans at night so drying happens while everyone sleeps—saving daytime energy from fans or HVAC systems.
Save Energy While Drying
- Use natural airflow whenever possible—open windows, cross-ventilate, and let fresh air do the work.
- Place lightweight fans in high-traffic areas instead of running heavy-duty dehumidifiers unless absolutely necessary.
Extend Carpet Life with Regular Maintenance
Vacuuming often and spot-treating small stains means you won’t need to run the Hoover as frequently. This not only saves on solution and electricity but also protects your carpet fibers from excessive wear.
Buy in Bulk (Wisely)
If you’re cleaning regularly, purchasing Hoover solution in larger bottles can save money over time. Just be sure to store it in a cool, dry place away from children’s reach.
By using your Hoover carpet cleaner efficiently, you get the most value from every drop of solution and every minute spent cleaning. Over time, these small savings add up—helping new parents manage both household chores and family budgets more effectively.
Conclusion
Learning how to use a Hoover carpet cleaner the right way can completely change the way your home feels. Instead of worrying about stains, odors, or germs in the carpet, you’ll know exactly how to deep clean safely and effectively. For busy households—especially those with babies, toddlers, or pets—this knowledge brings peace of mind.
By preparing the carpet properly, filling the tanks with the right solution, following careful cleaning passes, and allowing enough drying time, you can keep your floors looking fresh without calling a professional every few weeks. Add in proper maintenance and smart habits, and your Hoover will serve you well for years to come.
Clean carpets aren’t just about appearance—they’re about creating a healthier, safer environment for your family. With the steps and expert tips in this guide, your carpets can look nearly new again, no matter what life throws at them.
Frequently Asked Questions (People Also Ask)
When learning how to use a Hoover carpet cleaner, many people—especially new parents—have the same practical questions. Here are the answers from a professional perspective.
How Do I Use A Hoover Carpet Cleaner Step By Step?
Start by vacuuming your carpet, then fill the clean water tank with warm water and Hoover solution. In Wash Mode, press the trigger and push forward to apply solution. Pull back with the trigger released to extract dirty water. Repeat with overlapping strokes. Finally, switch to Rinse Mode and make dry passes to remove excess moisture.
Do I Have To Rinse The Carpet After Using A Hoover Carpet Cleaner?
Yes. Rinsing with plain water removes leftover detergent. If you skip this step, the carpet may feel sticky and attract dirt more quickly. Rinse mode also helps fibers stay softer and fresher.
Do You Put Water In A Hoover Carpet Cleaner?
Absolutely. All Hoover carpet cleaners require water—usually warm tap water—to work. You add solution to the clean water tank as directed, and the machine mixes it automatically (some models, like the SmartWash, do this for you).
How Often Should I Deep-Clean My Carpets With A Hoover?
For most families, every 3–6 months is enough. However, with babies crawling, toddlers spilling snacks, or pets running around, you may want to clean high-traffic areas monthly and spot-clean as needed.
Can I Use Homemade Cleaning Solutions In My Hoover?
It’s not recommended. Dish soaps or laundry detergents create too much foam, which can damage the machine and leave residue in your carpet. For safety (especially with children or pets), stick to Hoover-approved or carpet-safe solutions.
How Long Does It Take For Carpets To Dry After Using A Hoover?
With proper technique, most carpets dry within 6 to 12 hours. Factors like humidity, carpet thickness, and water usage can extend drying to 24 hours. Always improve airflow with fans or open windows to speed up the process.
Disclaimer: The information provided in this guide on how to use a Hoover carpet cleaner is for general cleaning and maintenance purposes only. Always follow the specific instructions and safety guidelines included in your Hoover carpet cleaner manual, as models and features may vary. The tips shared are based on professional experience and common household practices but may not apply to every carpet type or condition. For delicate, antique, or specialty carpets, consult the manufacturer’s care recommendations or seek advice from a certified carpet cleaning professional. The author and publisher are not responsible for any damage or issues resulting from the misuse of cleaning equipment or products.
Thanks for visiting Clearise Cleaning Services! Discover more helpful tips and expert cleaning insights by exploring our related categories.