Painting wood outdoor means applying the right type of paint to wood surfaces that stay outside, such as fences, decks, doors, garden benches, wooden chairs, tables, sheds, and outdoor décor. It may sound simple, but outdoor wood needs more care than indoor wood because it faces weather every day. Rain, sunlight, moisture, wind, heat, and cold can all affect how long the paint lasts.
Indoor wood is usually protected from harsh conditions, but outdoor wood is always exposed. Sunlight can fade the paint. Rain can make the wood swell. Moisture can cause peeling, mold, mildew, and even rot. Temperature changes can make the wood expand and shrink, which may cause cracks in the paint over time.
A good outdoor wood painting job depends on proper cleaning, sanding, repairing damaged wood, priming, choosing the right exterior paint, and applying paint in suitable weather. When each step is done carefully, the finish looks better and lasts longer.
This guide explains everything in simple words, including painting wood outdoor furniture, choosing outdoor furniture paint, using waterproof outdoor paint for wood furniture, and avoiding common mistakes that can ruin the final result.
Quick Guide Table
| Step | What to Do | Why It Matters |
| 1 | Clean the wood | Removes dirt, mold, dust, and grease so paint sticks better |
| 2 | Let it dry fully | Prevents trapped moisture, bubbling, and peeling |
| 3 | Scrape old paint | Removes loose layers before applying new paint |
| 4 | Sand the surface | Creates a smooth base for primer and paint |
| 5 | Repair damage | Fixes cracks, holes, and weak wood before painting |
| 6 | Apply primer | Helps seal the wood and improves paint adhesion |
| 7 | Use exterior paint | Protects wood from weather, sun, and moisture |
| 8 | Apply two thin coats | Gives better coverage and longer-lasting protection |
Step-by-Step Guide
- Inspect the wood first
- Check for peeling paint, cracks, soft spots, mold, mildew, and moisture damage.
- Clean the surface properly
- Use wood cleaner or mild detergent to remove dirt, dust, grease, and outdoor residue.
- Allow the wood to dry
- Let the wood dry fully before sanding, priming, or painting.
- Sand the wood
- Smooth rough areas and old paint edges so the new finish looks clean.
- Repair damaged areas
- Fill small cracks with exterior wood filler and replace badly rotten sections.
- Apply exterior primer
- Use the right primer for bare wood, stained wood, cedar, redwood, or repaired areas.
- Paint with outdoor wood paint
- Use weather-resistant exterior paint and apply thin, even coats.
- Let the paint cure
- Give the painted surface enough time before heavy use, especially outdoor furniture.
Understanding Outdoor Wood Before Painting
Outdoor wood reacts differently than indoor wood because it is exposed to changing weather. Wood naturally absorbs and releases moisture. When it rains or the air is humid, outdoor wood can take in moisture. When the sun comes out, the wood dries again. This repeated movement can make paint crack, peel, or lose its smooth finish.
Sun damage is another major issue. Strong sunlight can fade paint colors and dry out the wood surface. Over time, this can make the paint look dull or chalky. If the wood is not sealed or painted properly, water can enter the surface and cause swelling, cracking, mold, mildew, and wood rot.
Peeling paint is often a sign that the surface was not prepared well before painting. It can also happen when the wrong paint is used or when paint is applied over damp wood. Proper preparation helps the paint stick firmly to the wood. It also helps protect the wood from moisture and makes the finish more durable.
Before painting wood outdoor, it is important to understand that paint is not just for color. It also acts as a protective layer. The better the preparation, the stronger that protection will be.
Checking the Condition of Outdoor Wood
Before you start painting, inspect the wood carefully. This step helps you understand what kind of preparation is needed. New wood, old painted wood, weathered wood, cracked wood, and rotten wood all need different levels of care.
New wood may look clean, but it can still contain moisture or surface chemicals from treatment. It may need time to dry properly before painting. Previously painted wood should be checked for loose, peeling, or flaking paint. If old paint is not removed properly, the new paint may not stick well.
Weathered wood often has a rough, gray, or dry surface. It may need deeper cleaning and sanding before primer is applied. Cracked wood should be repaired with exterior wood filler, while soft or rotten wood may need to be replaced. Painting over rotten wood is never a good idea because the damage will continue under the paint.
Look for loose paint, moisture marks, rough patches, splinters, mold, mildew, and weak areas. Press gently on the wood in different spots. If it feels soft, spongy, or crumbly, it may be rotten. Fixing these problems before painting will help you get a smoother, longer-lasting finish.
Tools and Materials Needed for Painting Wood Outdoor
Having the right tools and materials makes the work easier and helps you get better results. For most outdoor wood painting projects, you will need a scraper, sandpaper, a sander, a cleaning brush, a drop cloth, a paintbrush, a roller, painter’s tape, and safety gloves.
A scraper is useful for removing old loose paint. Sandpaper or a sander helps smooth rough areas and prepare the surface for primer. A cleaning brush helps remove dirt, dust, and mildew from the wood. A drop cloth protects the ground, patio, or nearby surfaces from paint splashes. Painter’s tape helps keep edges clean, especially around trim, glass, hardware, or nearby walls.
You will also need the right materials. These include wood cleaner or mild detergent, exterior wood primer, stain-blocking primer, 100% acrylic exterior paint, wood filler, caulk, and waterproof outdoor paint for wood furniture when painting chairs, benches, tables, or other outdoor pieces.
The quality of the tools and materials matters. Cheap paint or the wrong primer may save money at first, but it can lead to peeling, fading, and repainting sooner than expected. For outdoor wood, it is better to choose products made specifically for exterior use.
Cleaning Outdoor Wood Before Painting
Cleaning is the first important step because paint cannot stick well to a dirty surface. Outdoor wood often collects dirt, dust, grease, pollen, mold, mildew, and old surface residue. If these things stay on the wood, they can weaken the bond between the paint and the surface.
Start by brushing off loose dirt and debris. Then wash the wood with a wood cleaner or mild detergent mixed with water. For mold or mildew, use a cleaner that is safe for exterior wood. Scrub the surface gently but thoroughly, especially in corners, grooves, and rough areas.
After cleaning, rinse the wood well and let it dry completely. This is very important. Painting damp wood can trap moisture inside, which may cause bubbling, peeling, or early paint failure. In many cases, outdoor wood should dry for at least 24 to 48 hours, depending on the weather, wood type, and how wet the surface became during cleaning.
Before sanding or priming, touch the wood and check that it feels dry. If the wood still feels cool, damp, or soft, give it more time. A dry surface gives primer and paint the best chance to bond properly.
Repairing Cracks, Holes, and Rotten Areas
Damaged wood should not be painted directly. Paint may hide the damage for a short time, but it will not fix the problem. Cracks, holes, gaps, and rotten spots should be repaired before primer and paint are applied.
Small cracks and holes can usually be filled with exterior wood filler. After the filler dries, sand the area smooth so it blends with the rest of the surface. For gaps where water can enter, use exterior caulk. This is especially useful around joints, edges, trim, and seams.
Badly rotten sections should be replaced instead of painted over. If the wood is soft, crumbly, or breaking apart, filler may not be enough. Replacing damaged pieces helps protect the rest of the structure and gives the paint a solid surface to stick to.
Painting over rotten wood often leads to poor results. The paint may peel quickly, and the rot may continue spreading underneath. Taking time to repair the wood first will make the finished project stronger, cleaner, and more durable.
Sanding Outdoor Wood for a Smooth Finish
Sanding helps primer and paint stick better. It also removes rough spots, splinters, old loose paint edges, and uneven surfaces. When painting wood outdoor furniture, sanding is especially important because furniture is touched and used often. A rough finish can feel uncomfortable and may wear down faster.
For rough or peeling areas, start with coarse sandpaper. This helps remove loose paint and smooth damaged spots. Then use finer sandpaper to create a smoother finish. Always sand in the direction of the wood grain when possible. This keeps the surface looking natural and reduces visible scratch marks.
After sanding, remove all dust before priming. Dust left on the surface can stop primer from bonding properly. Use a clean cloth, brush, or vacuum to clear the surface. The wood should feel clean, dry, and smooth before you move to the next step.
Sanding may feel like extra work, but it makes a big difference. It helps create a professional-looking finish and reduces the chance of peeling later.
Choosing the Right Primer for Outdoor Wood
Primer is important because it seals the wood and helps paint stick better. Outdoor wood is porous, which means it can absorb moisture and paint unevenly. Primer creates a better base for the paint and helps the final color look smoother.
There are different types of primer for outdoor wood. Exterior acrylic primer is a common choice for many wood surfaces. Alkyd primer can be useful for certain projects where strong sealing is needed. Stain-blocking primer is helpful when painting cedar, redwood, knots, or stained areas because these woods can sometimes bleed through the paint.
Bare wood should usually be primed before painting. Repaired areas should also be primed so they do not absorb paint differently from the rest of the surface. If you are using outdoor paint for wood with primer, read the product label carefully. Some paint-and-primer products work well on surfaces that are already painted and in good condition, but bare or stained wood often needs a separate primer.
Using the right primer may add one extra step, but it helps the paint last longer and look more even.
Best Paint Types for Outdoor Wood
The best paint for outdoor wood should be made for exterior use. It should resist weather, moisture, sunlight, and temperature changes. Outdoor paint also needs flexibility because wood expands and shrinks as the weather changes.
A good outdoor wood paint should offer weather resistance, UV protection, moisture resistance, strong adhesion, and a finish that can handle daily outdoor exposure. One of the most common choices is 100% acrylic exterior latex paint. It is flexible, durable, and suitable for many outdoor wood surfaces.
Exterior enamel paint is another option, especially when a harder finish is needed. For chairs, tables, benches, and patio pieces, waterproof outdoor paint for wood furniture is a smart choice. The best waterproof outdoor paint for wood furniture should protect against rain, humidity, spills, sunlight, and regular use.
When choosing the best paint for outdoor furniture, check that the product is suitable for wood and exterior conditions. Indoor paint should not be used outside because it is not made to handle weather exposure.
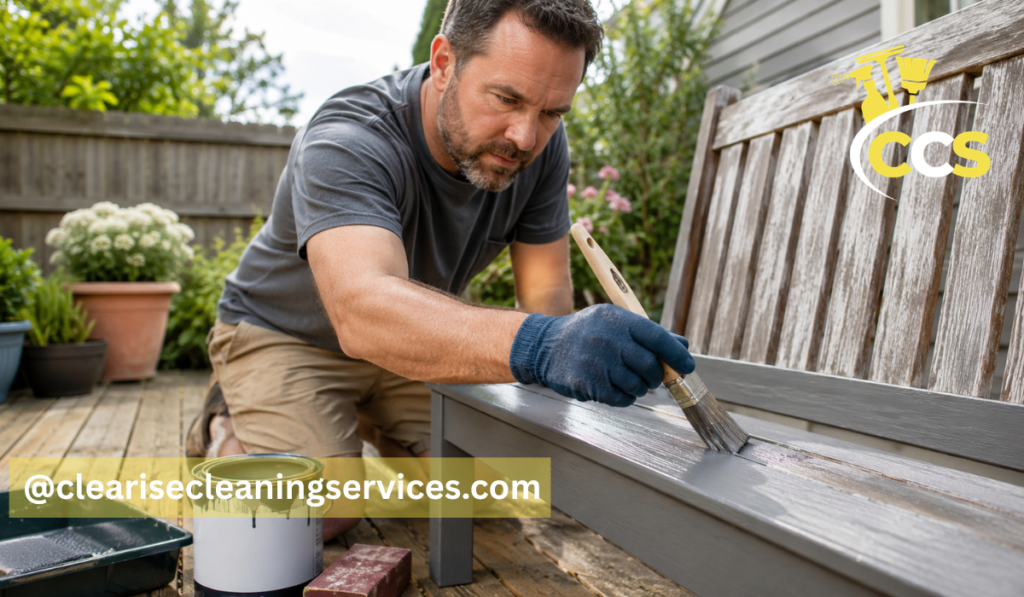
Painting Wood Outdoor Furniture
Painting wood outdoor furniture needs special care because furniture is used more directly than fences or walls. People sit on it, move it, clean it, and sometimes leave it exposed to rain and sun. This means the paint needs to be strong, smooth, and comfortable to touch.
Start by cleaning every side of the furniture, including the bottom, legs, corners, and hidden areas. Dirt and moisture often collect in joints and under seats. After cleaning, let the furniture dry fully. Then sand the edges, corners, arms, legs, and flat surfaces. Sanding helps remove rough spots and gives the primer a better grip.
If the furniture has loose joints, fix them before painting. Bare wood should be primed, especially if the furniture has been sanded down to the raw surface. Apply thin coats of outdoor furniture paint rather than one thick coat. Thin coats dry better and are less likely to drip, crack, or peel.
For painting wood outdoor furniture, choose paint that is made for exterior use. The best paint for outdoor furniture should protect against weather while also creating a smooth finish that looks clean and feels comfortable.
Waterproof Outdoor Paint for Wood Furniture
Waterproof outdoor paint for wood furniture helps protect wood from moisture. It creates a surface that can resist rain, humidity, spills, sunlight, and daily outdoor exposure. While no paint can make wood completely immune to damage forever, the right exterior paint can greatly reduce water absorption and slow down weather damage.
When choosing waterproof paint, make sure it is exterior-grade and suitable for wood. Some paints are made for metal, plastic, or masonry, so always check the label. If the wood is bare, stained, or weathered, use primer first. Primer helps the paint bond and gives better protection.
A second coat is usually recommended for stronger coverage and longer-lasting results. This is especially important for outdoor furniture because it often gets more wear than other wood surfaces. The best waterproof outdoor paint for wood furniture should combine moisture resistance, durability, and a finish that can handle regular cleaning and use.
Also remember that waterproof paint works best when the wood is prepared properly. Cleaning, sanding, repairing, and priming are still necessary for a strong finish.
Outdoor Paint for Wood With Primer
Outdoor paint for wood with primer can be useful in some situations, but it is important to understand how it works. Paint-and-primer products combine some priming qualities with paint, but they are not always a replacement for a separate primer.
Paint with primer may work well on previously painted wood that is still in good condition. It can also be useful for small furniture refresh projects or smooth surfaces that do not have stains, peeling paint, or bare wood. In these cases, it may save time while still giving good coverage.
However, separate primer is better for bare wood, stained wood, cedar, redwood, peeling old paint, repaired wood, or surfaces with knots and water stains. These surfaces need stronger sealing before paint is applied. If you skip primer in these cases, the paint may not stick well or stains may show through.
Before using outdoor paint for wood with primer, read the product instructions. The label will usually explain where the product works best and whether a separate primer is needed.
Exterior Wood Paint Colors
Exterior wood paint colors affect both the look and performance of your outdoor project. Color is not only about style. It can also influence how much heat the surface absorbs.
Light colors reflect more sunlight and may help keep wood surfaces cooler. This can be helpful for outdoor furniture, doors, and areas that receive direct sun. Dark colors can look rich and modern, but they may absorb more heat, which can cause the wood to expand more during hot weather.
Neutral colors work well for fences, decks, sheds, and trim because they blend naturally with outdoor spaces. Bold colors can refresh outdoor furniture and make a patio or garden area feel more lively. When choosing exterior wood paint colors, think about the house exterior, patio style, garden design, and other outdoor furniture.
It is also a good idea to test a small area before painting the whole surface. Outdoor light can make colors look different than they do indoors or on a paint card.
Step-by-Step Process for Painting Wood Outdoor
The best way to get a long-lasting finish is to follow each step in the right order. Start by inspecting the wood condition. Look for peeling paint, cracks, soft spots, mold, mildew, and rough areas. After inspection, clean the surface properly to remove dirt, dust, grease, and old residue.
Let the wood dry fully before moving forward. Once dry, scrape loose or peeling paint. Repair cracks, holes, or damaged areas with exterior wood filler or by replacing rotten pieces. Then sand the wood surface until it feels smooth and ready for primer.
After sanding, remove all dust with a cloth, brush, or vacuum. Apply exterior primer and allow it to dry completely according to the product directions. Once the primer is dry, apply the first thin coat of outdoor paint. Let it dry fully before applying the second coat.
The second coat gives better coverage and stronger weather protection. After painting, allow the surface to cure before heavy use. This is especially important for outdoor furniture, doors, railings, and surfaces that are touched often.
Best Weather Conditions for Painting Outdoor Wood
Weather plays a big role in how well outdoor paint dries and bonds to wood. The best conditions are dry weather, mild temperature, low humidity, no rain in the forecast, and no direct intense sunlight on the surface.
Painting in extreme heat can make paint dry too quickly on the surface, which may lead to brush marks or poor bonding. Painting in direct sunlight can also cause uneven drying. On the other hand, painting in cold or damp weather can slow drying and increase the risk of peeling.
Avoid painting wet wood, painting during extreme heat, painting before rain, or painting in freezing weather. Always check the weather forecast before starting. Choose a calm, dry day when the surface has enough time to dry between coats.
Good weather gives the paint time to settle, bond, and cure properly. This helps the final finish last longer.
Painting Outdoor Wood Furniture vs Metal Furniture
Wood furniture and metal furniture need different preparation. For wood furniture, the main steps are cleaning, sanding, priming, and using exterior wood paint. Wood needs protection from moisture, sunlight, and cracking, so the paint must be suitable for outdoor wood surfaces.
Metal furniture has different needs. Before painting metal, rust should be removed. A metal primer is usually needed to help prevent future rust and improve paint adhesion. Paint made for metal surfaces should be used instead of regular wood paint.
The keyword outdoor furniture paint metal is often searched by people comparing paint options for different furniture materials. However, if your furniture is made of wood, focus on paint made for outdoor wood. Using the wrong paint can lead to poor results, peeling, or a finish that does not last.
If a furniture piece has both wood and metal parts, prepare each material separately and use the correct primer and paint for each surface.
Common Mistakes to Avoid When Painting Wood Outdoor
Many outdoor wood painting problems happen because small steps are skipped. One common mistake is painting over dirty wood. Dirt, dust, and mildew can stop paint from sticking properly. Another mistake is skipping sanding, which can leave the surface rough and weak.
Not using primer is also a common issue, especially on bare wood or repaired areas. Primer helps seal the surface and improve paint adhesion. Using indoor paint outside is another mistake because indoor paint is not made to handle rain, sunlight, and temperature changes.
Painting wet wood can trap moisture under the paint. Applying thick coats can cause drips, uneven drying, and peeling. Painting in direct sunlight or bad weather can also lead to poor results. Ignoring rotten wood is another serious mistake because paint cannot repair decay.
Choosing the wrong paint for outdoor furniture can also reduce the life of the finish. Always choose exterior-grade products that match the surface you are painting.
How to Make Outdoor Wood Paint Last Longer
Outdoor wood paint lasts longer when the painted surface is cared for properly. Clean painted wood regularly to remove dirt, pollen, mildew, and stains. A gentle wash can help keep the surface fresh without damaging the paint.
Touch up scratches early before moisture gets into the wood. Small chips or cracks can grow bigger if they are ignored. If you have outdoor furniture, keep it covered during harsh weather or store it indoors when possible. This is especially helpful during heavy rain, snow, extreme heat, or long periods of direct sun.
Avoid standing water on painted surfaces. Water that sits too long can weaken paint and increase the risk of peeling. Repaint when the finish starts fading, cracking, or wearing thin. Waiting too long can make the next painting job harder because more repair work may be needed.
Using quality exterior paint from the beginning also helps. Good paint, proper primer, and careful preparation are the main reasons some outdoor wood finishes last much longer than others.
Conclusion
Painting wood outdoor requires more than simply brushing on a coat of paint. Outdoor wood needs proper preparation, the right primer, and weather-resistant paint to handle sun, rain, moisture, and daily exposure. When the surface is cleaned, repaired, sanded, primed, and painted carefully, the final result looks better and lasts longer.
Whether you are painting a fence, door, shed, bench, table, or chair, each step matters. Choosing the right outdoor furniture paint and waterproof outdoor paint for wood furniture can help protect the wood from weather damage and everyday wear.
The best results come from patience. Take time to inspect the wood, prepare the surface, choose the right products, and paint in good weather. A careful approach will give outdoor wood a stronger finish, better protection, and a cleaner look for years to come.
FAQs
What Is The Best Way For Painting Wood Outdoor?
The best way is to clean, dry, sand, repair, prime, and then apply exterior paint in thin coats. Good preparation helps the paint stick better and last longer.
Do I Need Primer Before Painting Outdoor Wood?
Yes, primer is usually needed, especially on bare, stained, repaired, or weathered wood. It seals the surface and helps exterior paint bond properly.
What Paint Is Best For Outdoor Wood?
A 100% acrylic exterior latex paint is a good choice for most outdoor wood. For furniture, choose waterproof outdoor paint made for wood surfaces.
Can I Paint Outdoor Wood Without Sanding?
You should not skip sanding if the wood is rough, peeling, or weathered. Sanding helps create a smooth surface and improves paint adhesion.
How Long Should Outdoor Wood Dry Before Painting?
Outdoor wood should usually dry for 24 to 48 hours after cleaning. The surface must be fully dry before primer or paint is applied.
Disclaimer: This article is for general informational purposes only. Painting results may vary depending on wood type, weather, product quality, and surface condition. Always read product labels, follow manufacturer instructions, and take proper safety precautions before starting any outdoor painting project.
Thanks for visiting Clearise Cleaning Services! Discover more helpful tips and expert cleaning insights by exploring our related categories.