
Old European farmhouses have a look that new brick cannot copy on its own: soft white mortar washed over the brick, worn thin in places so the colour shows through, with texture you can feel under your fingers. German schmear recreates that look on an ordinary brick wall or fireplace. It is not paint, and it is not a thin wash. It is mortar, smeared on and partly wiped away before it sets, and the result is a finish that looks aged rather than decorated. This guide explains what German schmear is, what you need, how to apply it step by step, and how it differs from whitewash and limewash, so you can decide whether it suits your wall.
What German Schmear Is
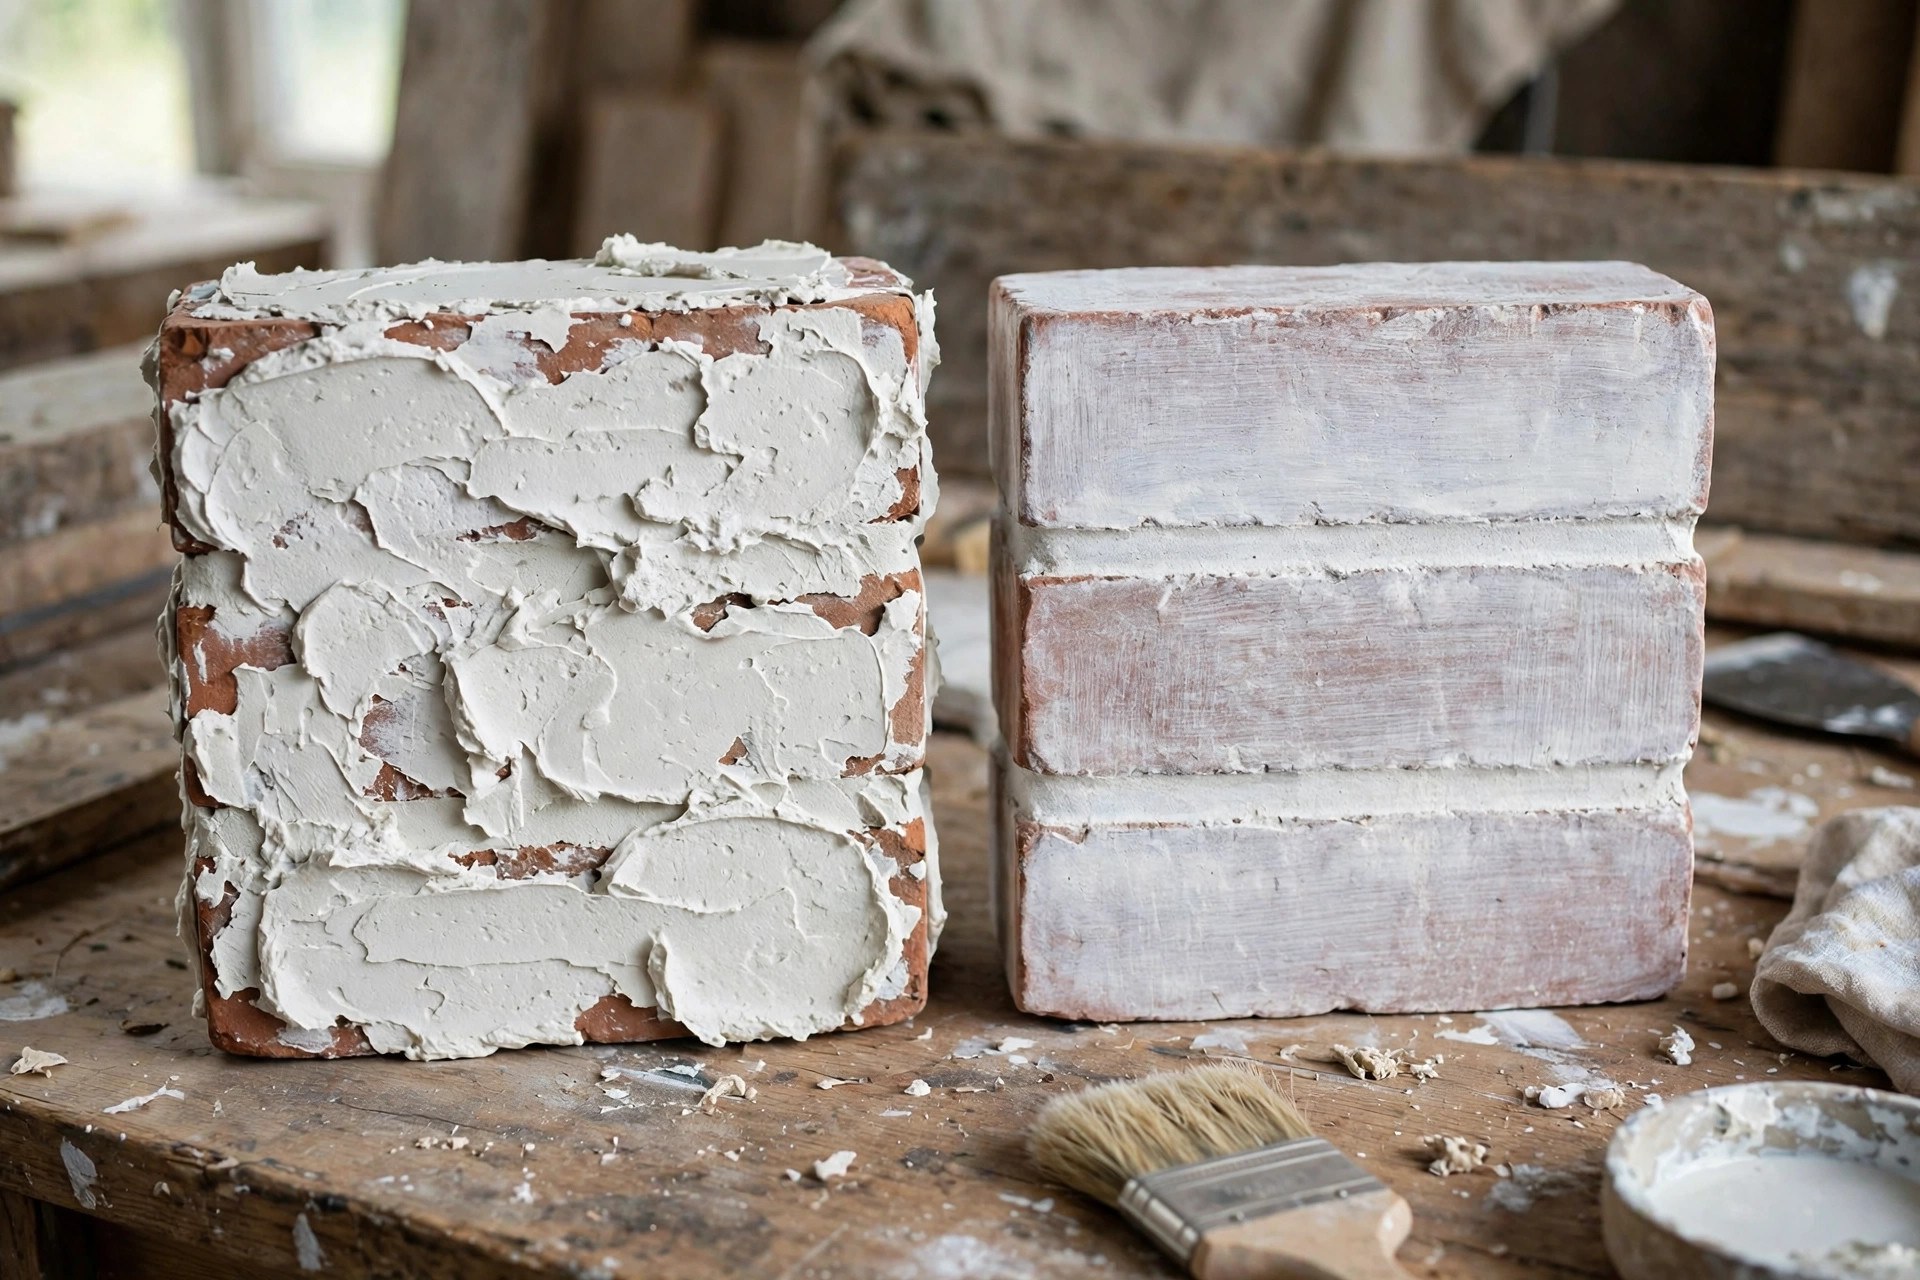
German schmear is a masonry technique from northern Germany in which a thin coat of white, cement-based mortar is smeared over brick or stone, then partly wiped away before it dries, leaving a textured, distressed finish with some of the original brick showing through. The word “schmear” comes from the German word for smear or spread, and the technique is also called German smear or mortar wash.
It works best on raw, unpainted brick with a rough, textured face, because the mortar needs something to grip. Smooth, sealed, or previously painted brick will not hold the mortar well, and the finish can peel or flake. It suits fireplaces, accent walls, exterior facades, and kitchen backsplashes made of brick, and it is popular in farmhouse, cottage, and European-style interiors where a soft, aged surface fits the room.
German Schmear vs Whitewash, Limewash, and Paint
German schmear differs from whitewash, limewash, and paint in its material: it uses thick cement-based mortar for texture, while whitewash uses watered-down paint, limewash uses slaked lime and water, and paint forms a flat, solid film. The material decides the look, the texture, and how hard the finish is to remove.
| Feature | German schmear | Whitewash | Limewash | Paint |
|---|---|---|---|---|
| Main material | White cement-based mortar | Watered-down latex paint | Slaked lime and water | Acrylic or masonry paint |
| Look | Thick, rustic, aged | Soft, faded | Matte, chalky | Solid, uniform colour |
| Texture | Heavy, fills joints | Little to none | Light, powdery | Smooth |
| Brick visibility | Adjustable, partial | Semi-transparent | Depends on coats | None |
| Ease of application | Moderate, test first | Easy | Easy to moderate | Easy |
| Durability | Very durable | Less durable | Moderate | Needs repainting |
| Permanence | Hard to remove | Can be painted over | Wears off over time | Easy to repaint |
If you want a soft, changeable finish, whitewash or limewash is the safer choice. If you want texture, depth, and a finish that will last for years without attention, German schmear is the better one, as long as you are sure about the look, because taking it off is a hard job. For help deciding when a wall needs cleaning rather than a new finish, read our guide to how to know when it is time to clean vs when it is time to repaint.
Materials and Tools You Need
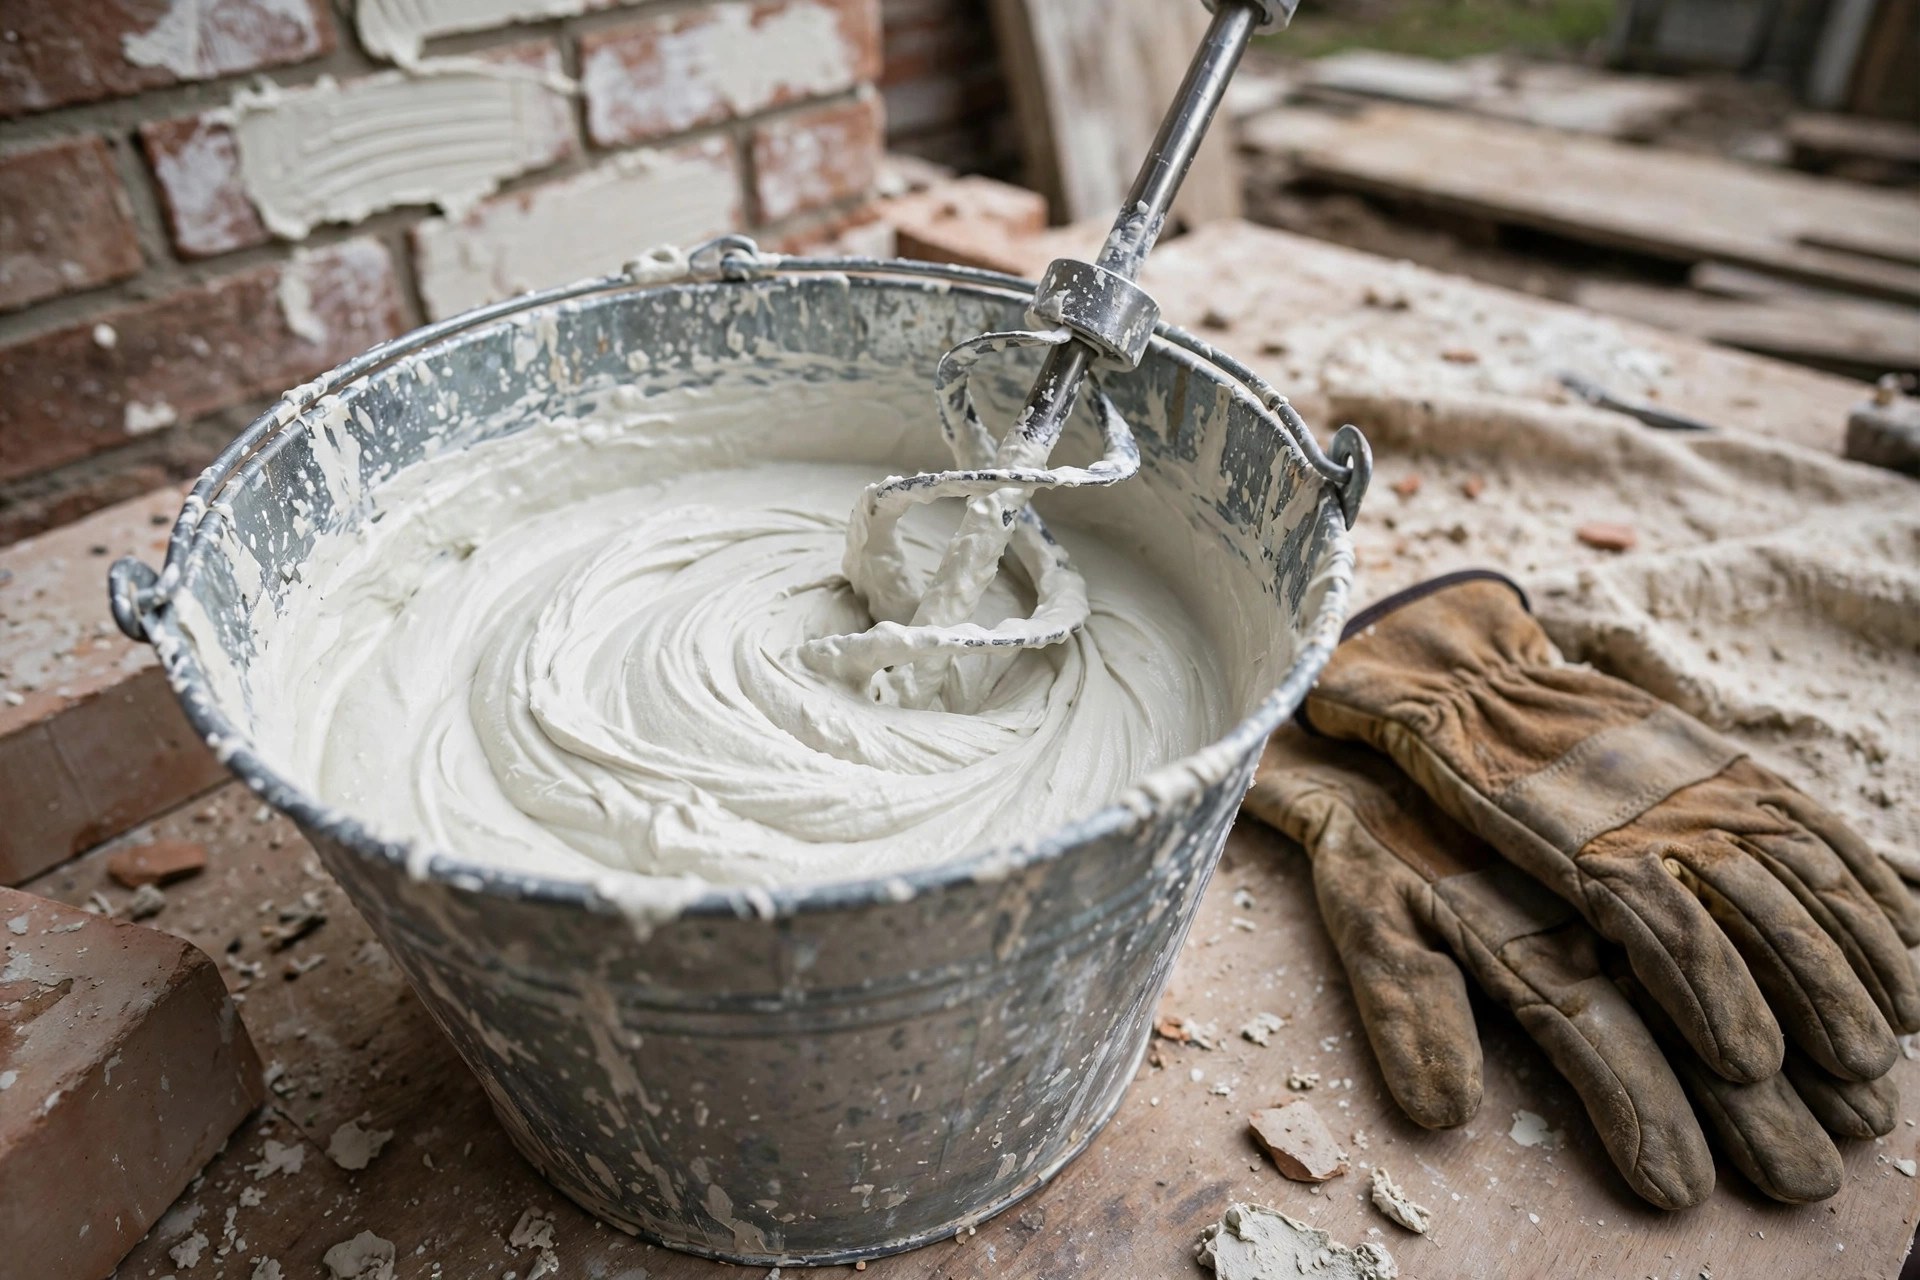
For a German schmear you need white or light-coloured Type N mortar, clean water, a large bucket, a drill with a paddle mixer, a mason’s trowel or wide putty knife, a grout sponge, rubber gloves, safety goggles, a stiff brush, drop cloths, and a spray bottle. The mortar is the one material that decides the result, so choose it with care.
Tools matter less than timing, but they should all be within reach before you mix anything. Once the mortar is mixed, the clock is running, and you do not want to stop to find a sponge. Lay drop cloths over the floor and any nearby surfaces, because mortar splashes and it sets hard. Wear rubber gloves and safety goggles throughout, and wear old clothes you do not mind ruining. Mortar is alkaline and it irritates skin, so wash any splashes off promptly.
The Mortar Mix: Ratio and Consistency
The standard starting mix for German schmear is about 70 percent dry mortar to 30 percent water, mixed to a thick consistency like peanut butter or thick pancake batter, and adjusted with a little more water for a thinner wash or a little less for a heavier texture. The consistency matters more than the exact ratio, because it decides how the mortar spreads and how much brick shows through.
A thicker mix gives a heavy, opaque finish with deep texture, covering more of the brick face. A thinner mix, with a little more water, gives a sheer, translucent wash that lets more of the brick colour show through. Always test the mix on a small, hidden section of brick first, or on a spare brick, and let it dry before you judge it. Wet mortar looks darker and heavier than dry mortar, and a test patch is the only honest way to see the finished colour. If you want to change the colour of the room rather than the brick, read our guide to what kind of paint for interior walls first, because paint and schmear solve different problems.
Preparing the Brick Before You Start
Prepare the brick by cleaning it with a stiff brush, removing dust, cobwebs, loose mortar, and efflorescence, and checking that it is raw and unpainted, because German schmear will not bond reliably to sealed or painted brick. Preparation is straightforward, but skipping it is the most common reason a schmear fails.
Check the surface honestly before you mix anything. If the brick has been painted, sealed, or coated, the mortar will not grip, and you will need to strip the coating first, which is a separate job. If the brick is very smooth, the finish will be thinner and less textured, and you may need a slightly thicker mix. If the joints are deep and crumbling, fill the worst gaps first and let them set before you start the schmear. A sound surface gives a sound finish.
How to Apply German Schmear Step by Step
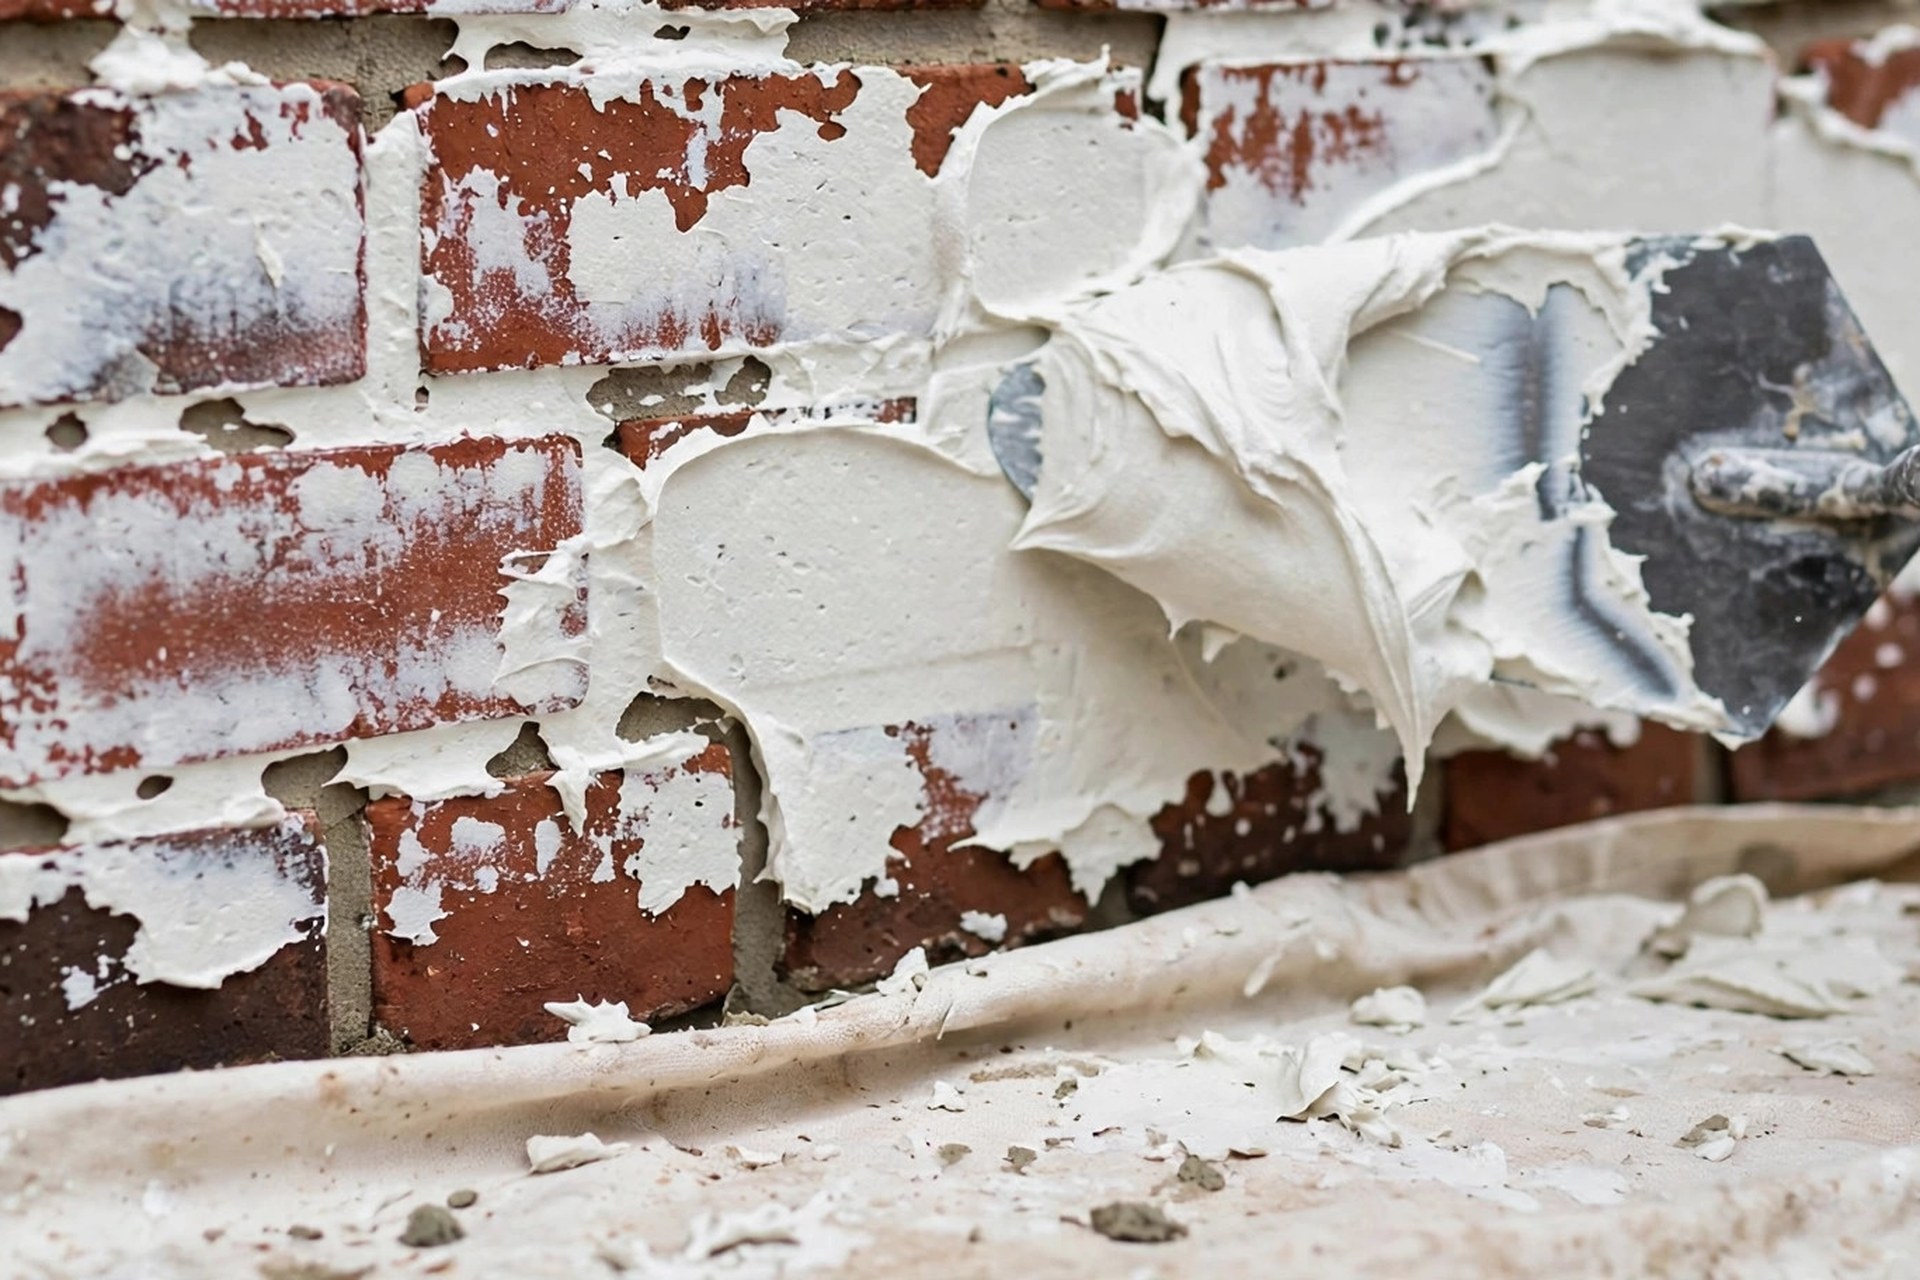
To apply German schmear, wet the brick, work in small sections no larger than about five square feet, press mortar into the joints first, smear it unevenly across the brick faces, then wipe back some mortar with a damp sponge or brush before it sets to expose the brick underneath. Work from the top of the wall down, and finish one section before you start the next.
- Clean and dampen the brick. Brush the surface clean, then mist it with water from a spray bottle or wipe it with a damp sponge. The wall should be damp, not dripping.
- Mix a small batch of mortar. Mix about 70 percent mortar to 30 percent water to a peanut-butter consistency, and test it on a hidden patch first.
- Work in a small section. Take a section no larger than about five square feet, starting at the top of the wall so drips fall on unfinished work below.
- Fill the joints first. Press mortar firmly into the joints with a trowel or grout bag, so the joints are filled and the mortar has something to hold onto.
- Smear mortar across the brick faces. Spread the mortar unevenly over the bricks with a trowel, putty knife, or gloved hand, varying the thickness for a natural, aged look.
- Wipe back the excess. After a few minutes, use a damp sponge, a stiff brush, or a trowel to remove mortar from the bricks where you want more colour to show, stepping back often to check the effect.
- Move to the next section. Finish one section before you start the next, and try to complete a whole wall in one session, because matching the mix across different days is very hard.
- Let it cure. The mortar feels dry to the touch within a few hours, but it needs longer to cure fully, so keep it dry and undisturbed while it sets.
Step back often while you work. The finish should look uneven and natural, with some bricks more covered than others, and the joints reading as soft, pale lines rather than hard, straight ones. If one area looks too heavy, wipe it back while the mortar is still workable. If one area looks too light, add a little more mortar and blend the edges into the work around it.
Coverage Guide: Light, Medium, and Heavy German Schmear
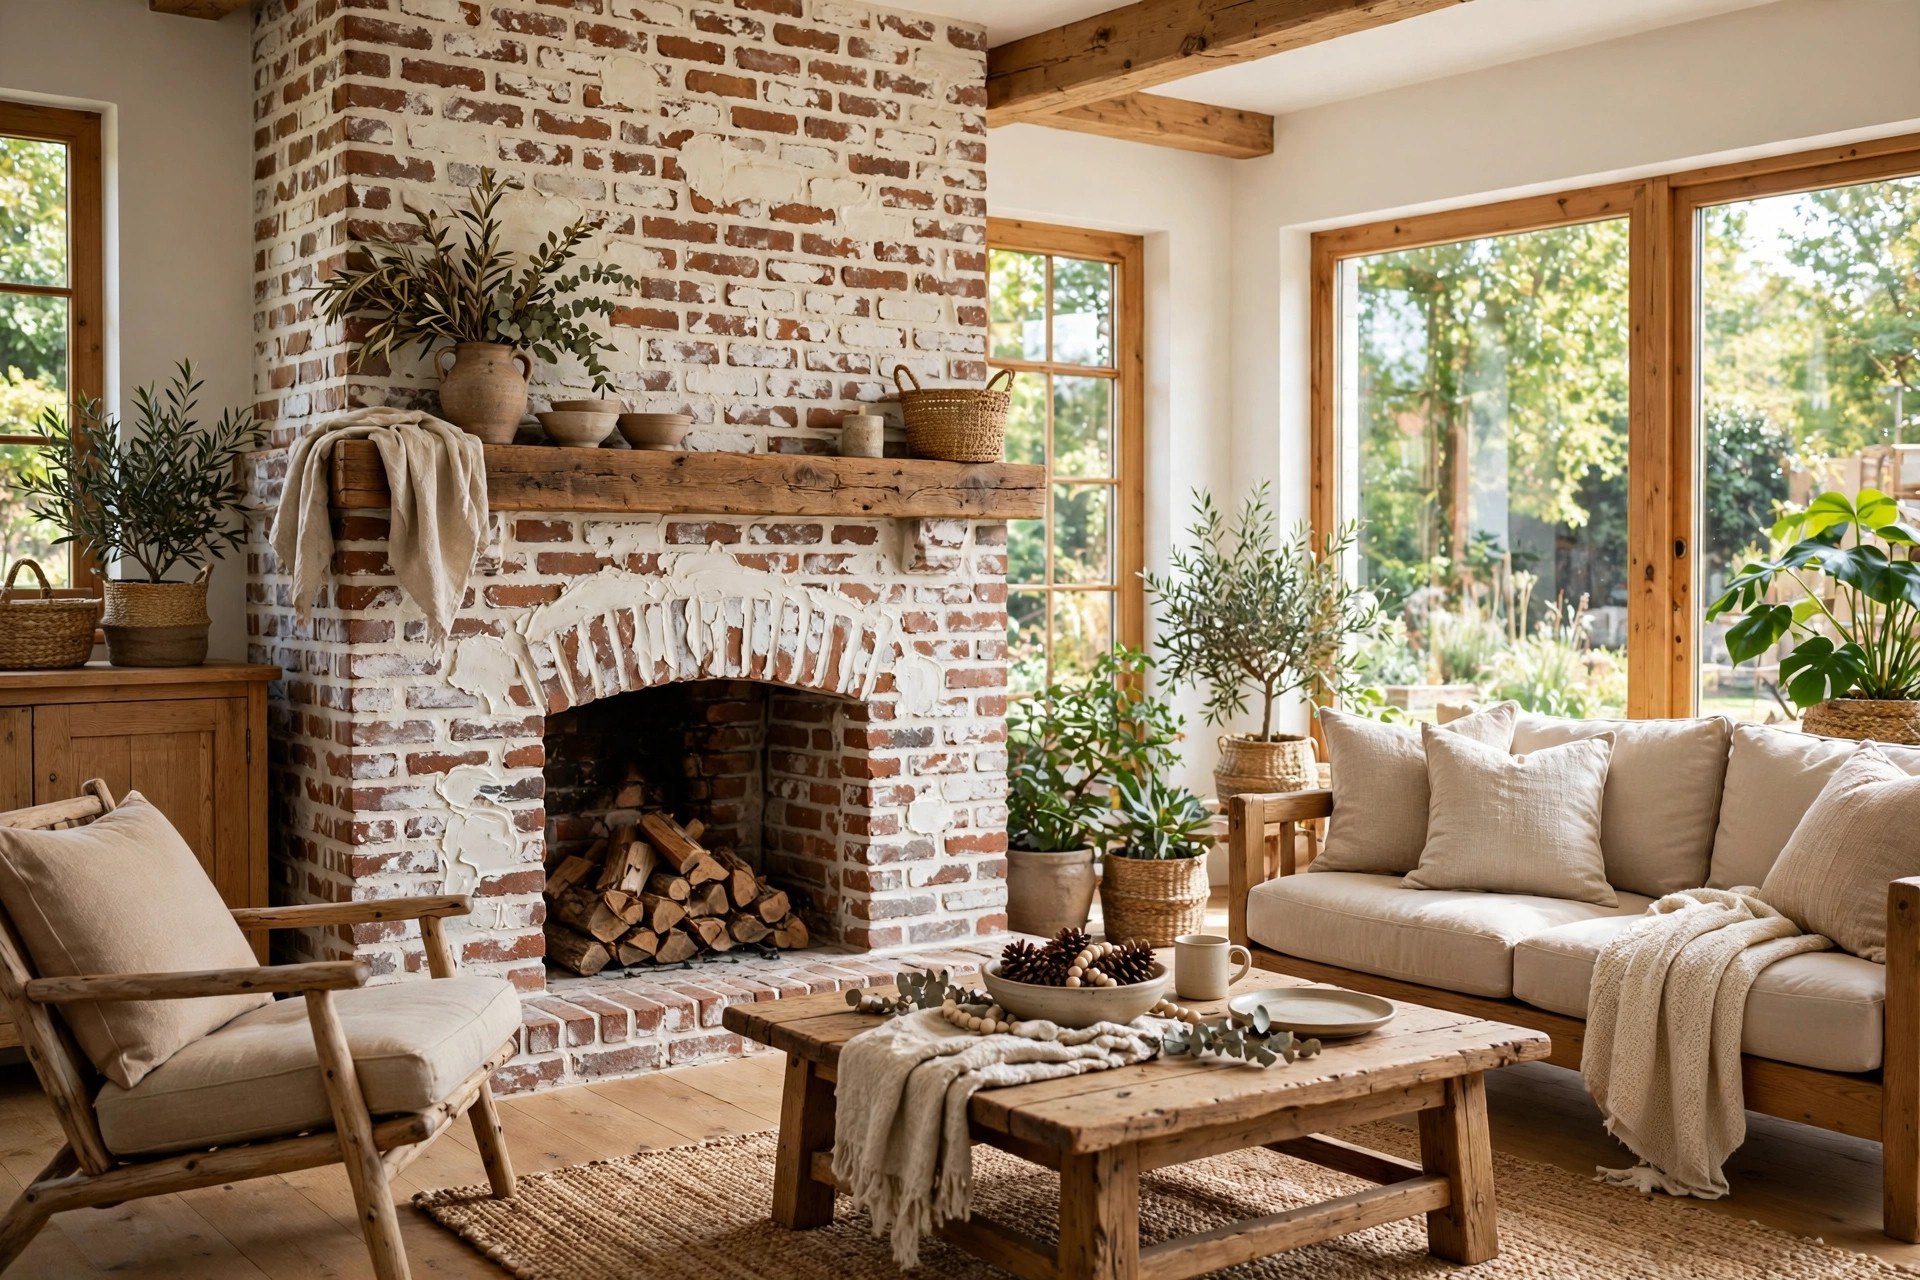
Coverage is controlled by the mix and the wipe-back: a light German schmear leaves most of the brick visible, a medium one covers about half the brick, and a heavy one covers most of it with deep texture, and the choice should match the room and the brick underneath. A test patch for each level is the only way to choose honestly.
| Coverage | Mix | Wipe-back | Best for |
|---|---|---|---|
| Light | Thinner, more water | Wipe back soon after applying | Red brick you still want to see, small fireplaces |
| Medium | Standard 70/30 mix | Wipe back after a few minutes | Most accent walls and fireplaces, the classic look |
| Heavy | Thicker, less water | Wipe back lightly, or not at all | Very dark brick, exterior walls, a strong rustic look |
Light coverage suits a room where the brick is already attractive and you only want to soften it. The mortar reads as a pale haze, and the brick colour does most of the work. Medium coverage is the classic German schmear, and it suits most fireplaces and accent walls, because the balance of white and brick feels aged without hiding the material. Heavy coverage suits dark brick that you want to lighten strongly, or an exterior wall where you want a bold, old-farmhouse look, but it is the hardest to reverse and the easiest to overdo, so test it carefully before you commit to a whole wall.
Curing, Sealing, and Maintenance
After application, German schmear mortar feels dry within a few hours, reaches about 60 percent of its final strength within the first 24 hours, and takes up to 28 days to cure fully, so keep the wall dry and undisturbed for at least the first day or two. Mortar usually takes 24 to 48 hours to set firmly, and the full cure is what gives it its strength.
Maintenance is light. Dust the wall with a soft brush or a dry cloth, and rinse an exterior wall with water occasionally.
German Schmear on a Fireplace
German schmear on a fireplace works best on a raw brick fire surround, applied in the same way as a wall, with the mortar kept away from the firebox opening and the hearth cleaned of soot before you start. A fireplace is the most popular place for this finish, because it is a single, contained surface where the aged look feels natural.
Do not apply mortar inside the firebox, where direct flame and extreme heat will crack it. The finish belongs on the surround and the chimney breast, not in the fire itself. After the work is done, wait until the mortar has cured before you light a fire, so the heat does not dry the mortar too fast and crack it. If the fireplace is in a kitchen, and you are also thinking about the cabinets around it, read our guide to how to paint kitchen cabinets for a finish that pairs well with a lightened brick surround.
Mistakes to Avoid With German Schmear
The most common German schmear mistakes are mixing too much mortar at once, working in sections that are too large, wiping back too early or too late, applying it to painted or sealed brick, and skipping the test patch. Each one is easy to avoid once you know it, and each one is hard to fix after the mortar has set.
Skipping the test patch is the mistake that causes the most regret. Wet mortar looks darker than dry mortar, and a finish that looks right when wet can look far heavier when dry. Test a small patch, let it dry fully, and live with it for a day before you commit. The same care applies to the wall itself: if you are unsure whether a wall needs a new finish at all, read our guide to how to remove wallpaper glue for a reminder that surface preparation, not the finish, decides most results.
German Schmear on Interior vs Exterior Brick
German schmear works on both interior and exterior brick, but exterior work needs dry weather and a longer cure, while interior work needs more protection for floors and trim. Outdoors, pick a dry spell with no rain forecast for at least two days, because rain on fresh mortar washes it off and weakens the finish. Indoors, the mortar cures more slowly in a cool room, so give it extra time before you hang anything on the wall.
Exterior schmear also faces sun, frost, and rain over the years, so a slightly thicker mix and a full cure matter more there. Interior schmear faces cooking grease and dust, so a fireplace or kitchen wall benefits from a light dusting now and then.
Conclusion
German schmear is a simple idea done with care: white mortar smeared over raw brick, then partly wiped away, leaving a textured, aged finish that lets the brick show through. The mix starts at about 70 percent mortar to 30 percent water, the work happens in small sections, and the wipe-back, timed a few minutes after application, decides the final look. It is more textured and more permanent than whitewash or limewash, and it suits fireplaces and accent walls where an old European feel fits the room. Test a patch, work slowly, and accept that the finish is hard to reverse. Done well, a German schmear wall looks as if it has stood for a hundred years, and it will keep that look for many more.
Frequently Asked Questions
What is German schmear made of?
German schmear is made of white, cement-based mortar, usually Type N mortar, mixed with water to a thick consistency. It is smeared over brick, not painted on like a coating.
Is German schmear the same as whitewash?
No, German schmear uses mortar for texture, while whitewash uses watered-down paint. German schmear is thicker, more textured, more durable, and much harder to remove than whitewash.
Can I do German schmear myself?
Yes, German schmear is a popular DIY project for a fireplace or accent wall. Test a patch first, mix small batches, work in small sections, and wipe back the mortar before it sets.
How long does German schmear take to dry?
German schmear feels dry within a few hours and sets firmly in 24 to 48 hours, but it takes up to 28 days to cure fully. Keep the wall dry while it cures.
Can German schmear be removed?
German schmear is very hard to remove once it has cured, because the mortar bonds to the brick. It can sometimes be chipped or ground off, but the brick underneath may be damaged, so treat it as permanent.
Disclaimer: This article is provided purely for informational purposes. clearisecleaningservices.com only provides information about German schmear and does not offer masonry, renovation, or contracting services, guest posting, paid promotion, or advertising. Mortar is alkaline and can irritate skin and eyes, so wear gloves and eye protection and wash splashes off promptly.
Thanks for visiting Clearise Cleaning Services! Discover more helpful tips and expert cleaning insights by exploring our related categories.